
Pacifica · Residential Dryer Exhaust Cleaning Inspection
Pacifica Dryer Exhaust Cleaning Clears Severe Fire Hazard Lint
A full inspection and deep cleaning of a Pacifica home's dryer exhaust system removed heavy, compacted lint from the dryer cabinet, burner compartment, and exhaust duct, eliminating an active fire hazard.
Completed October 23, 2026
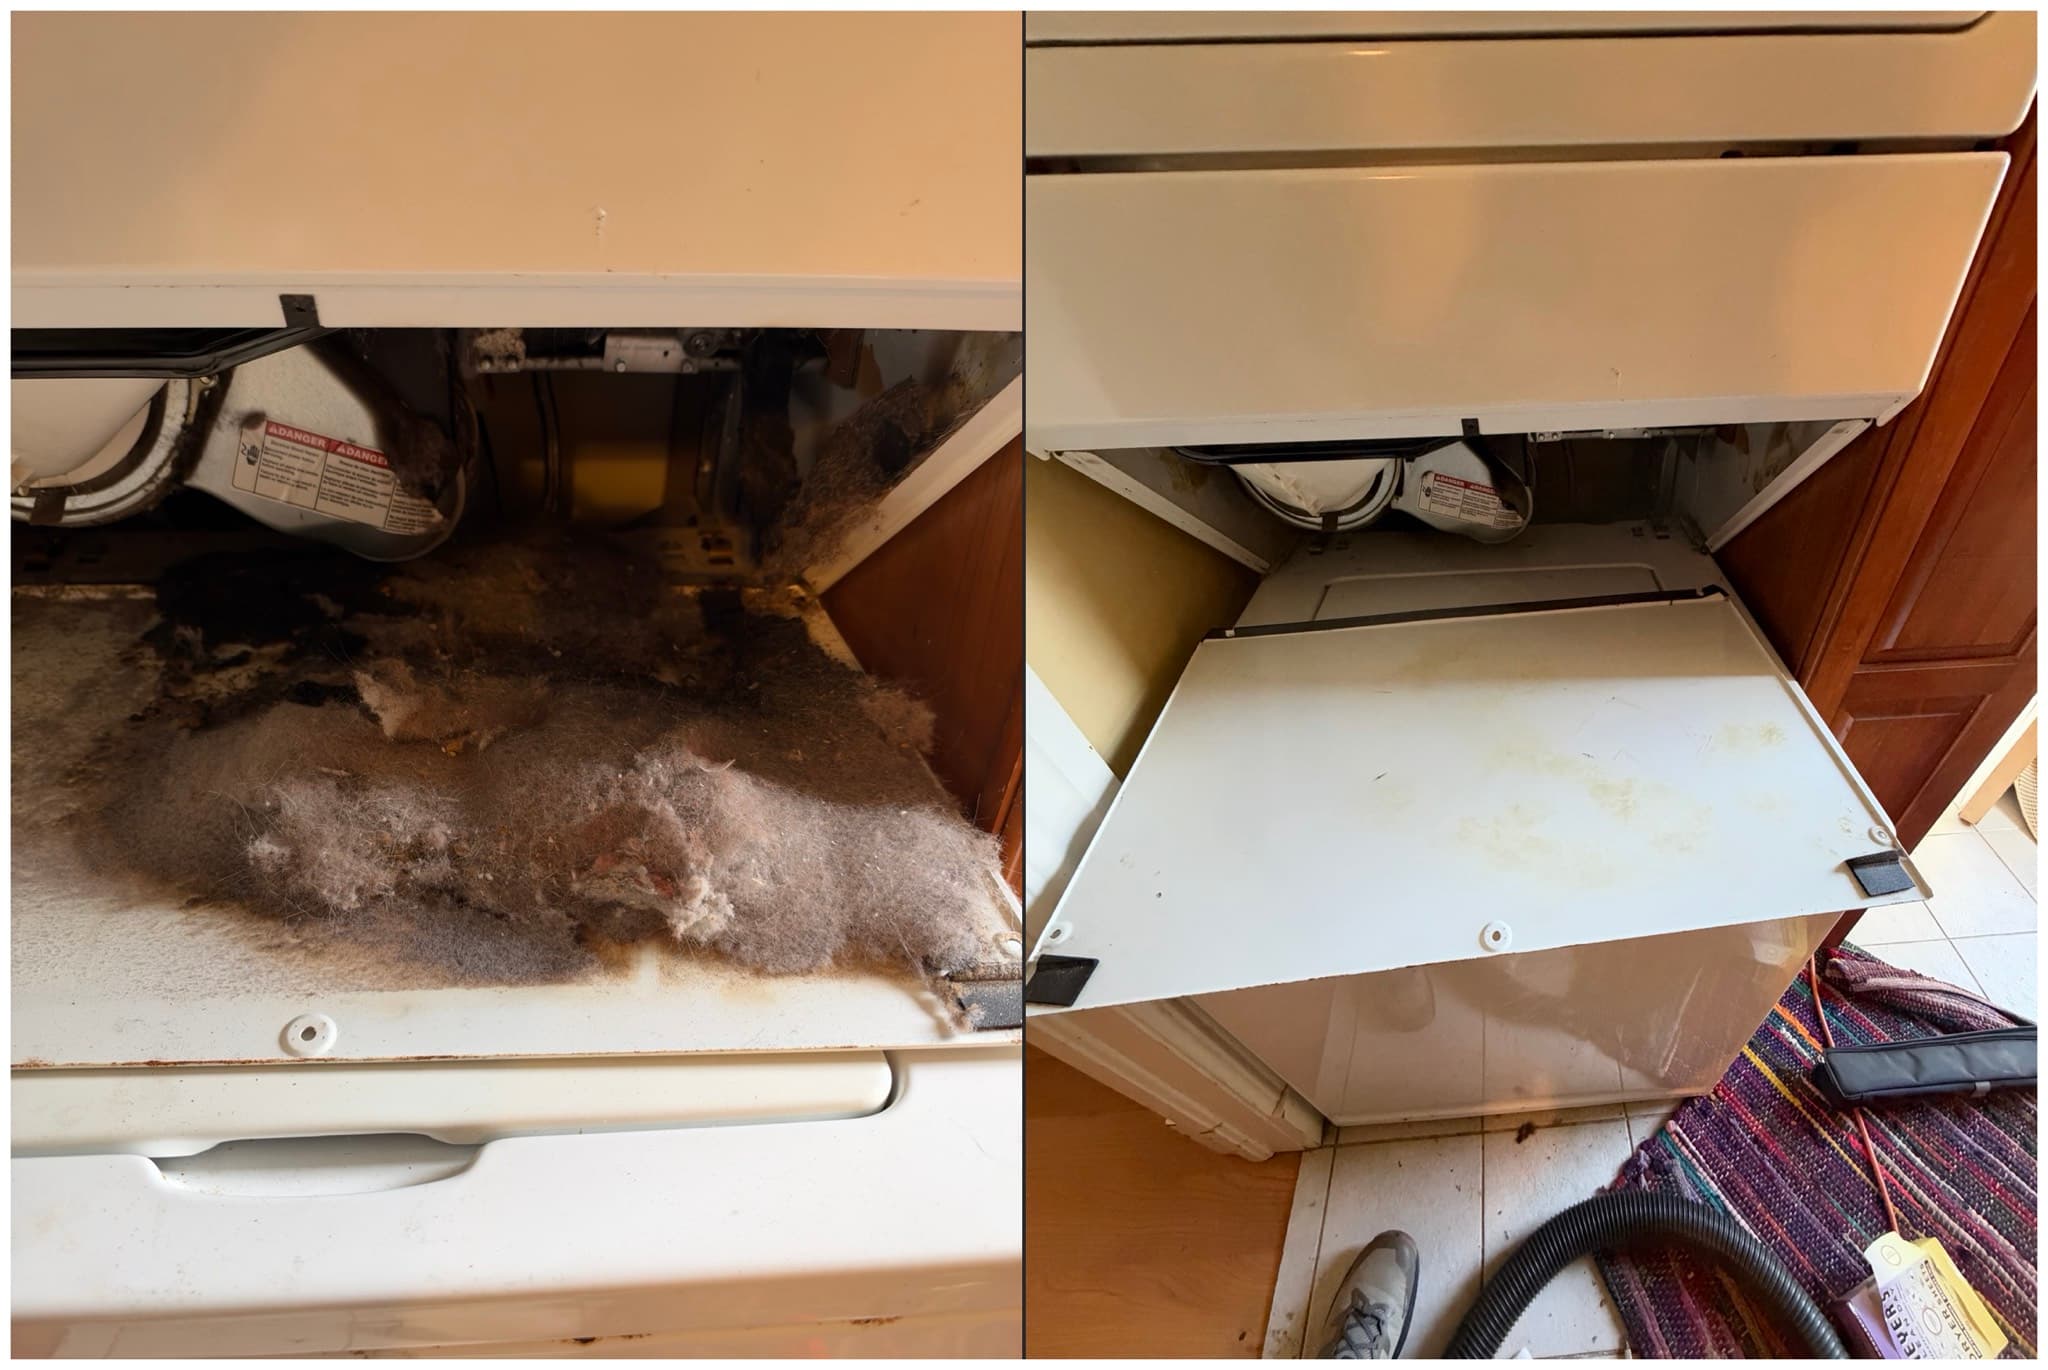
Dryer duct connection before and after cleaning
What We Found
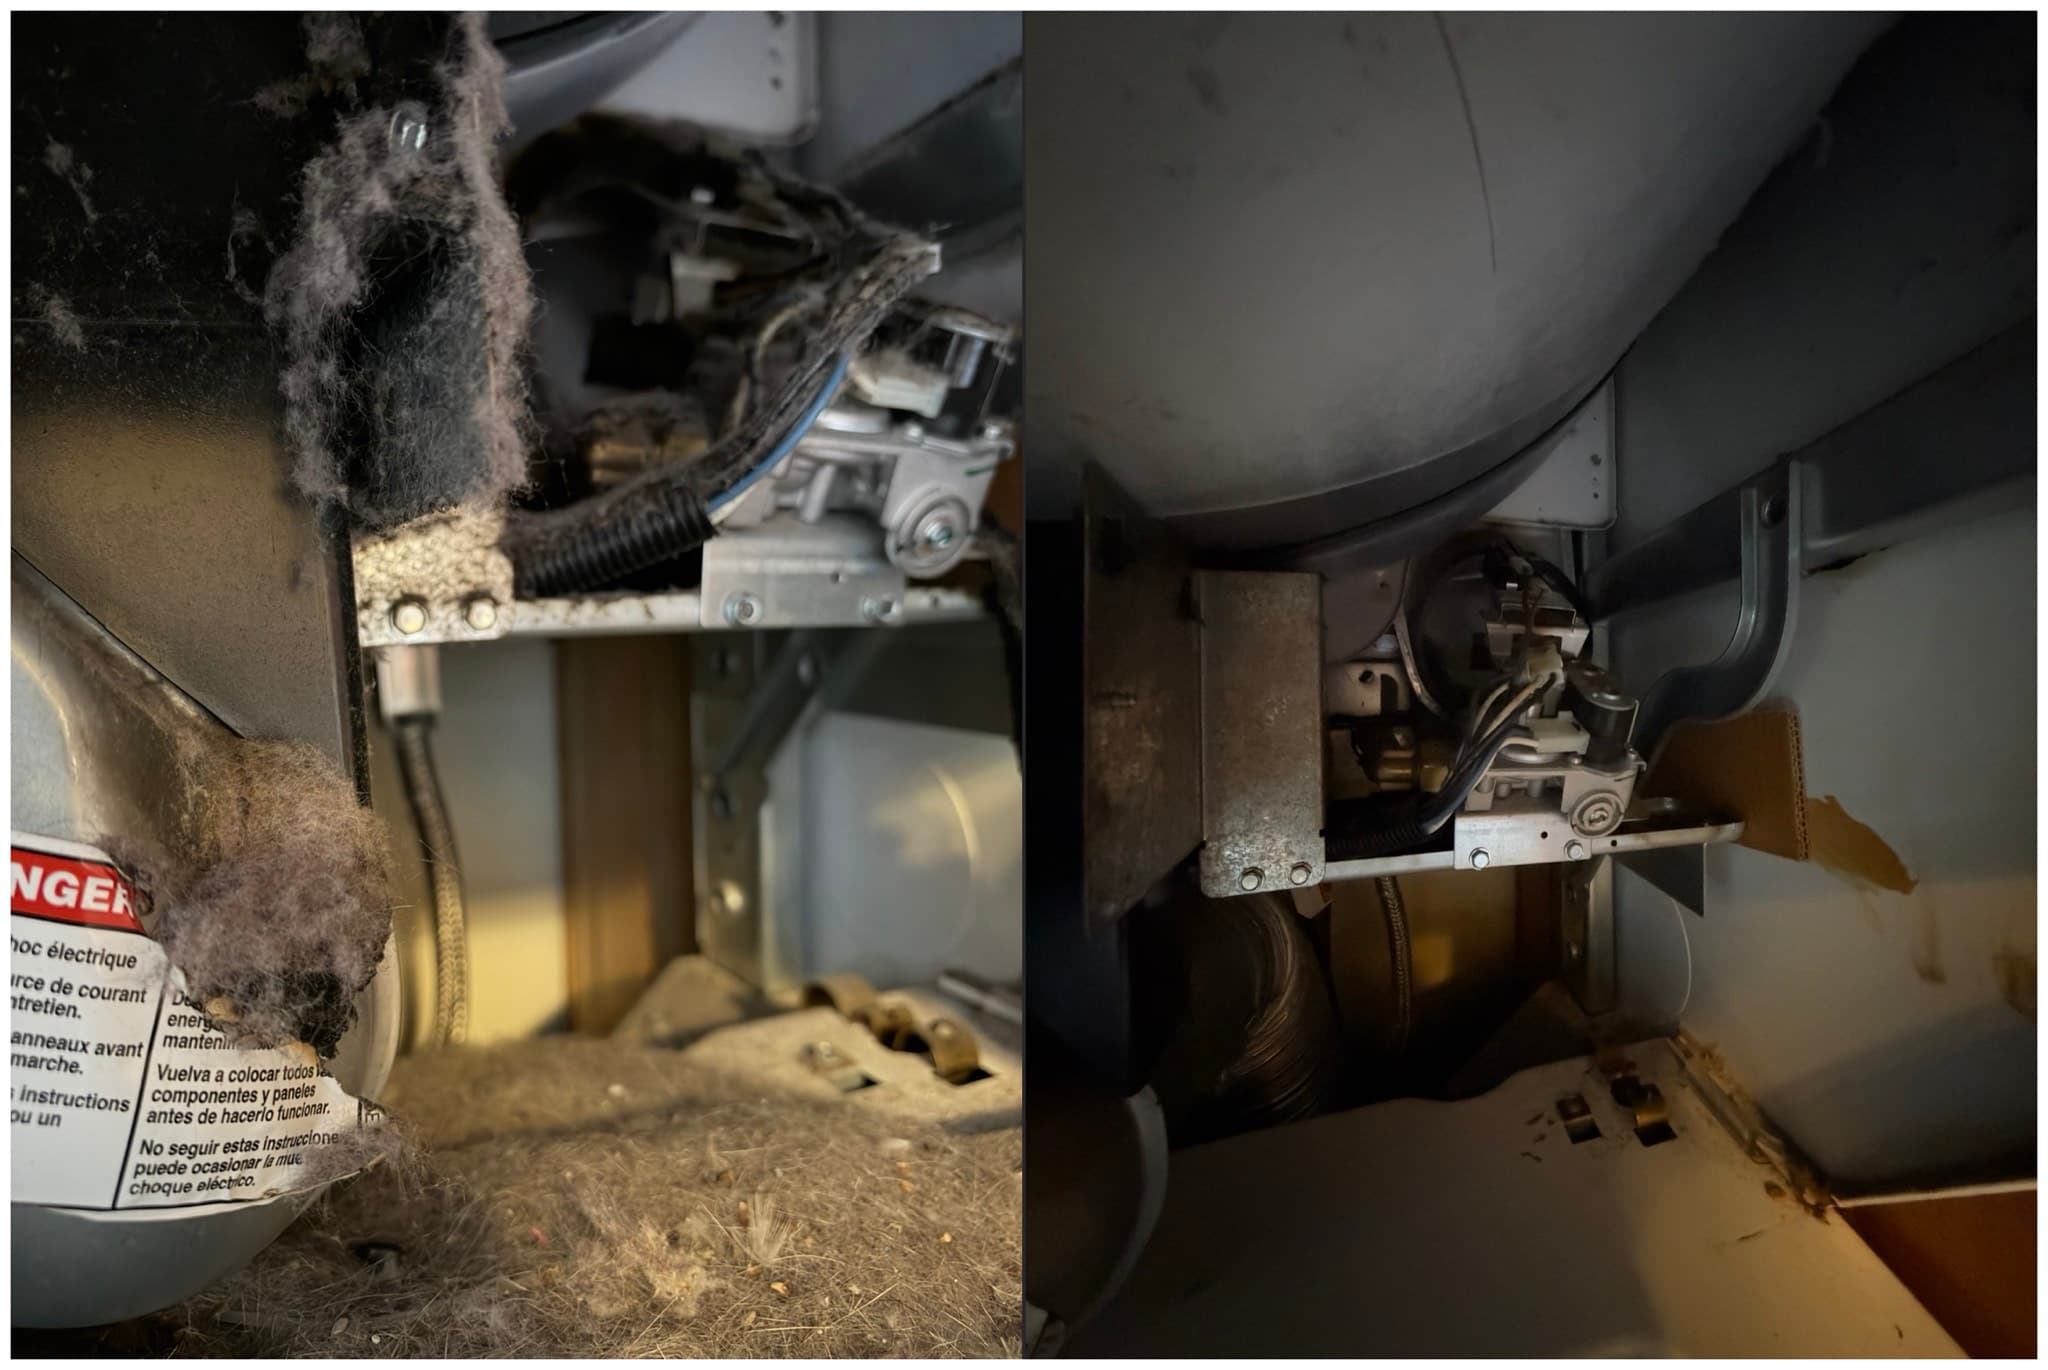
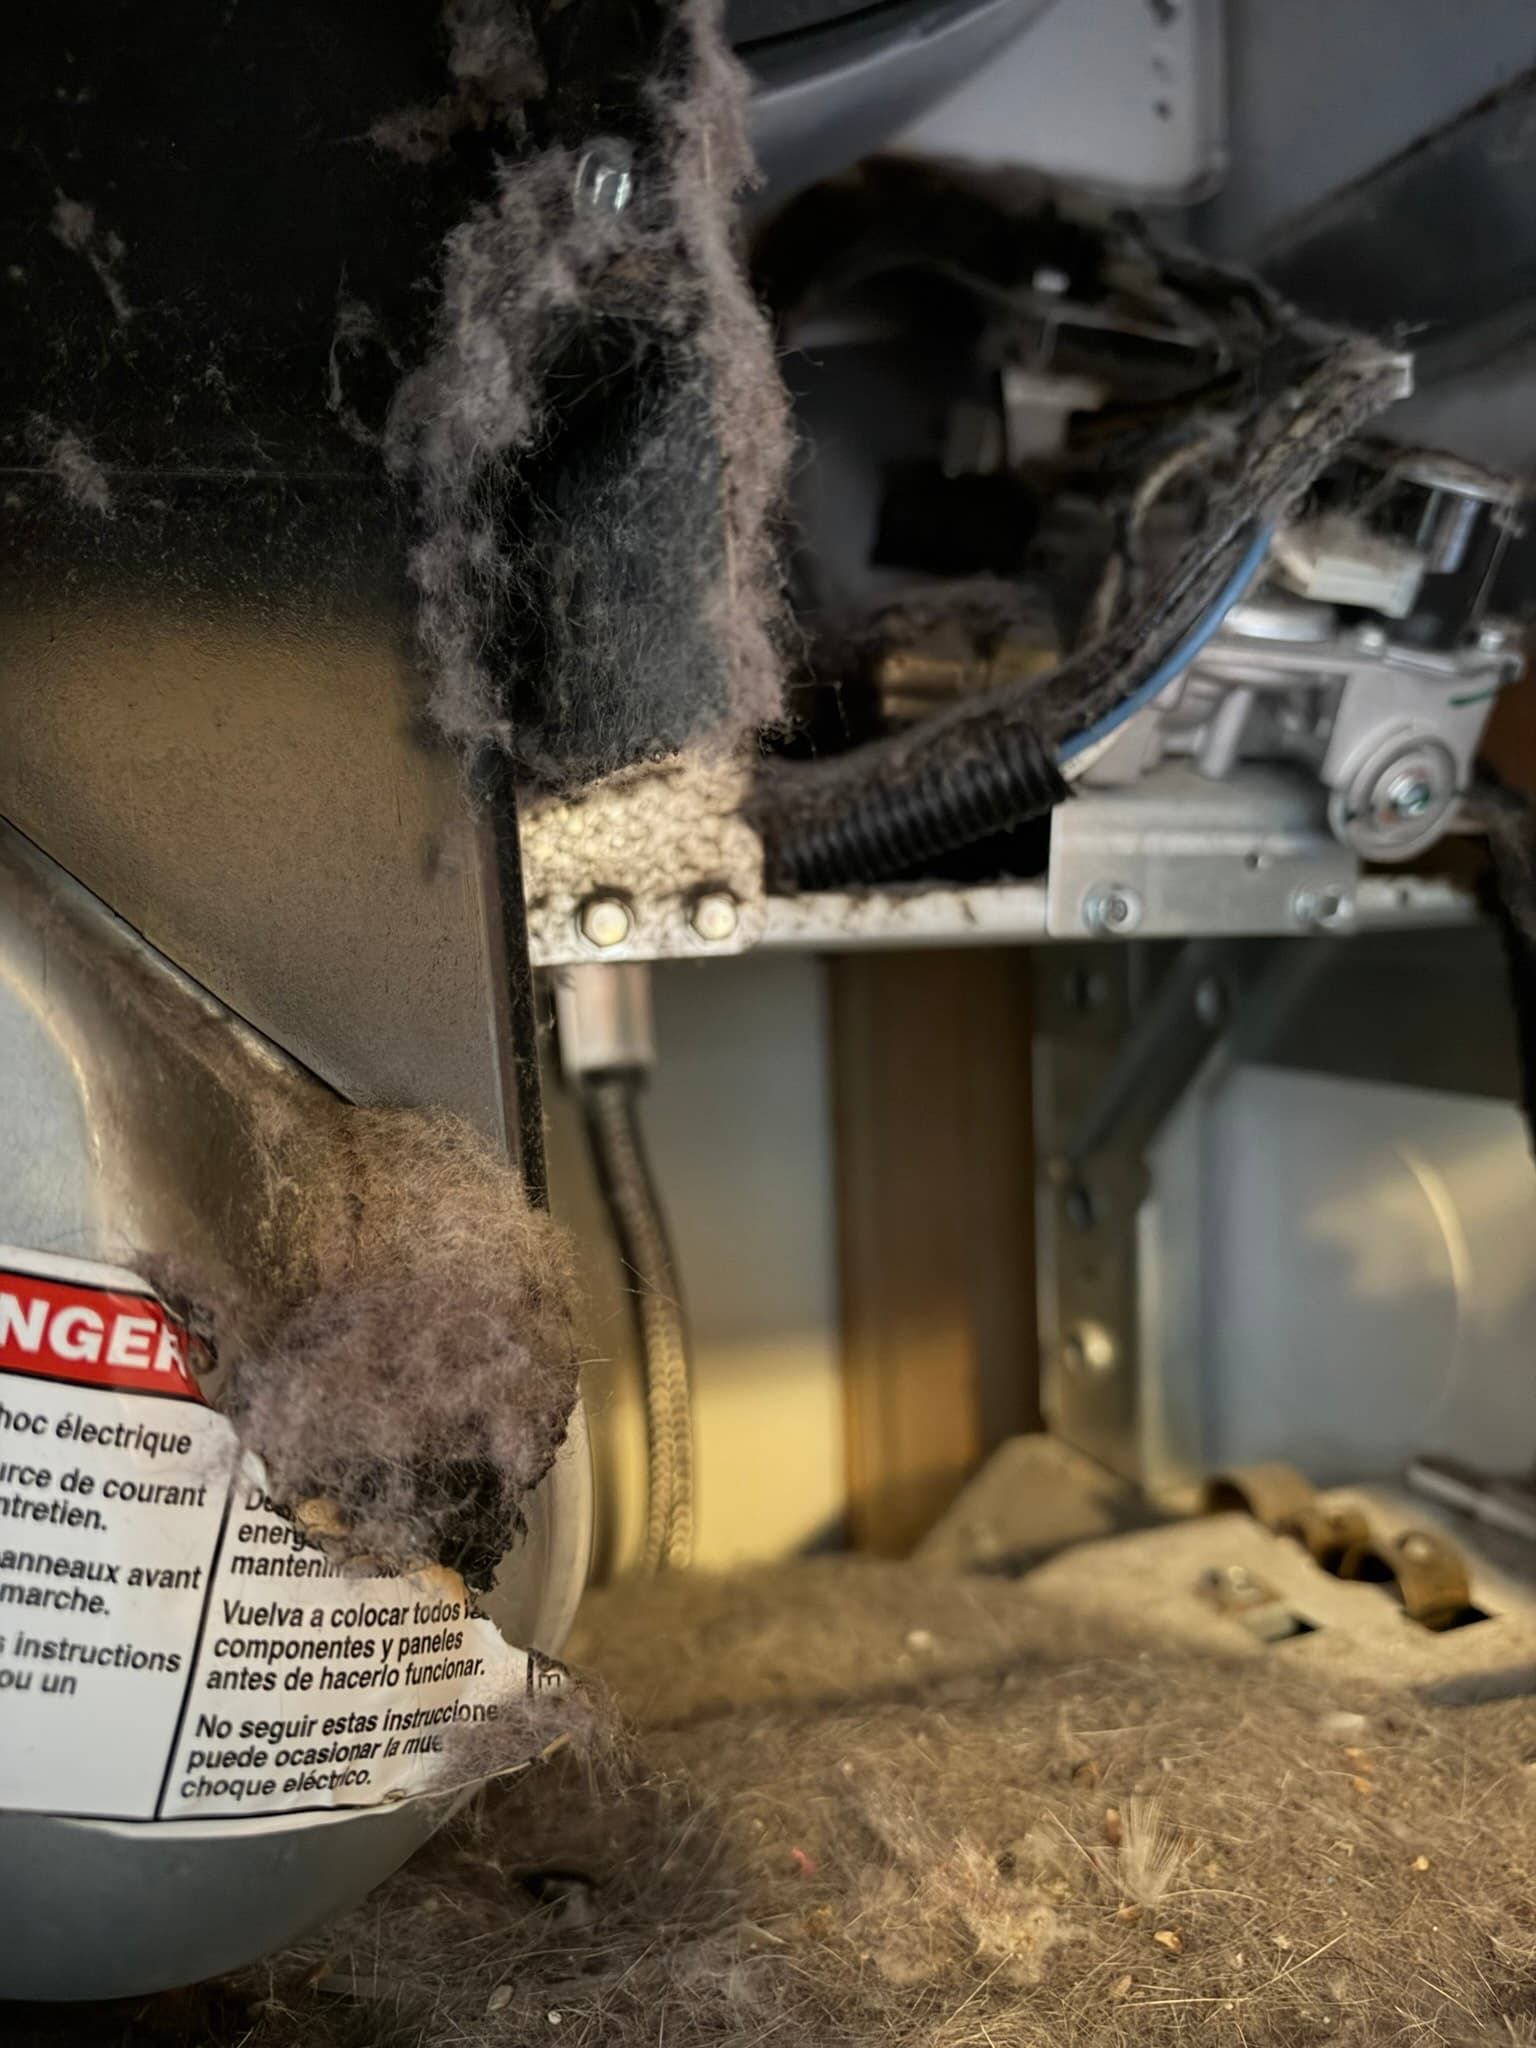
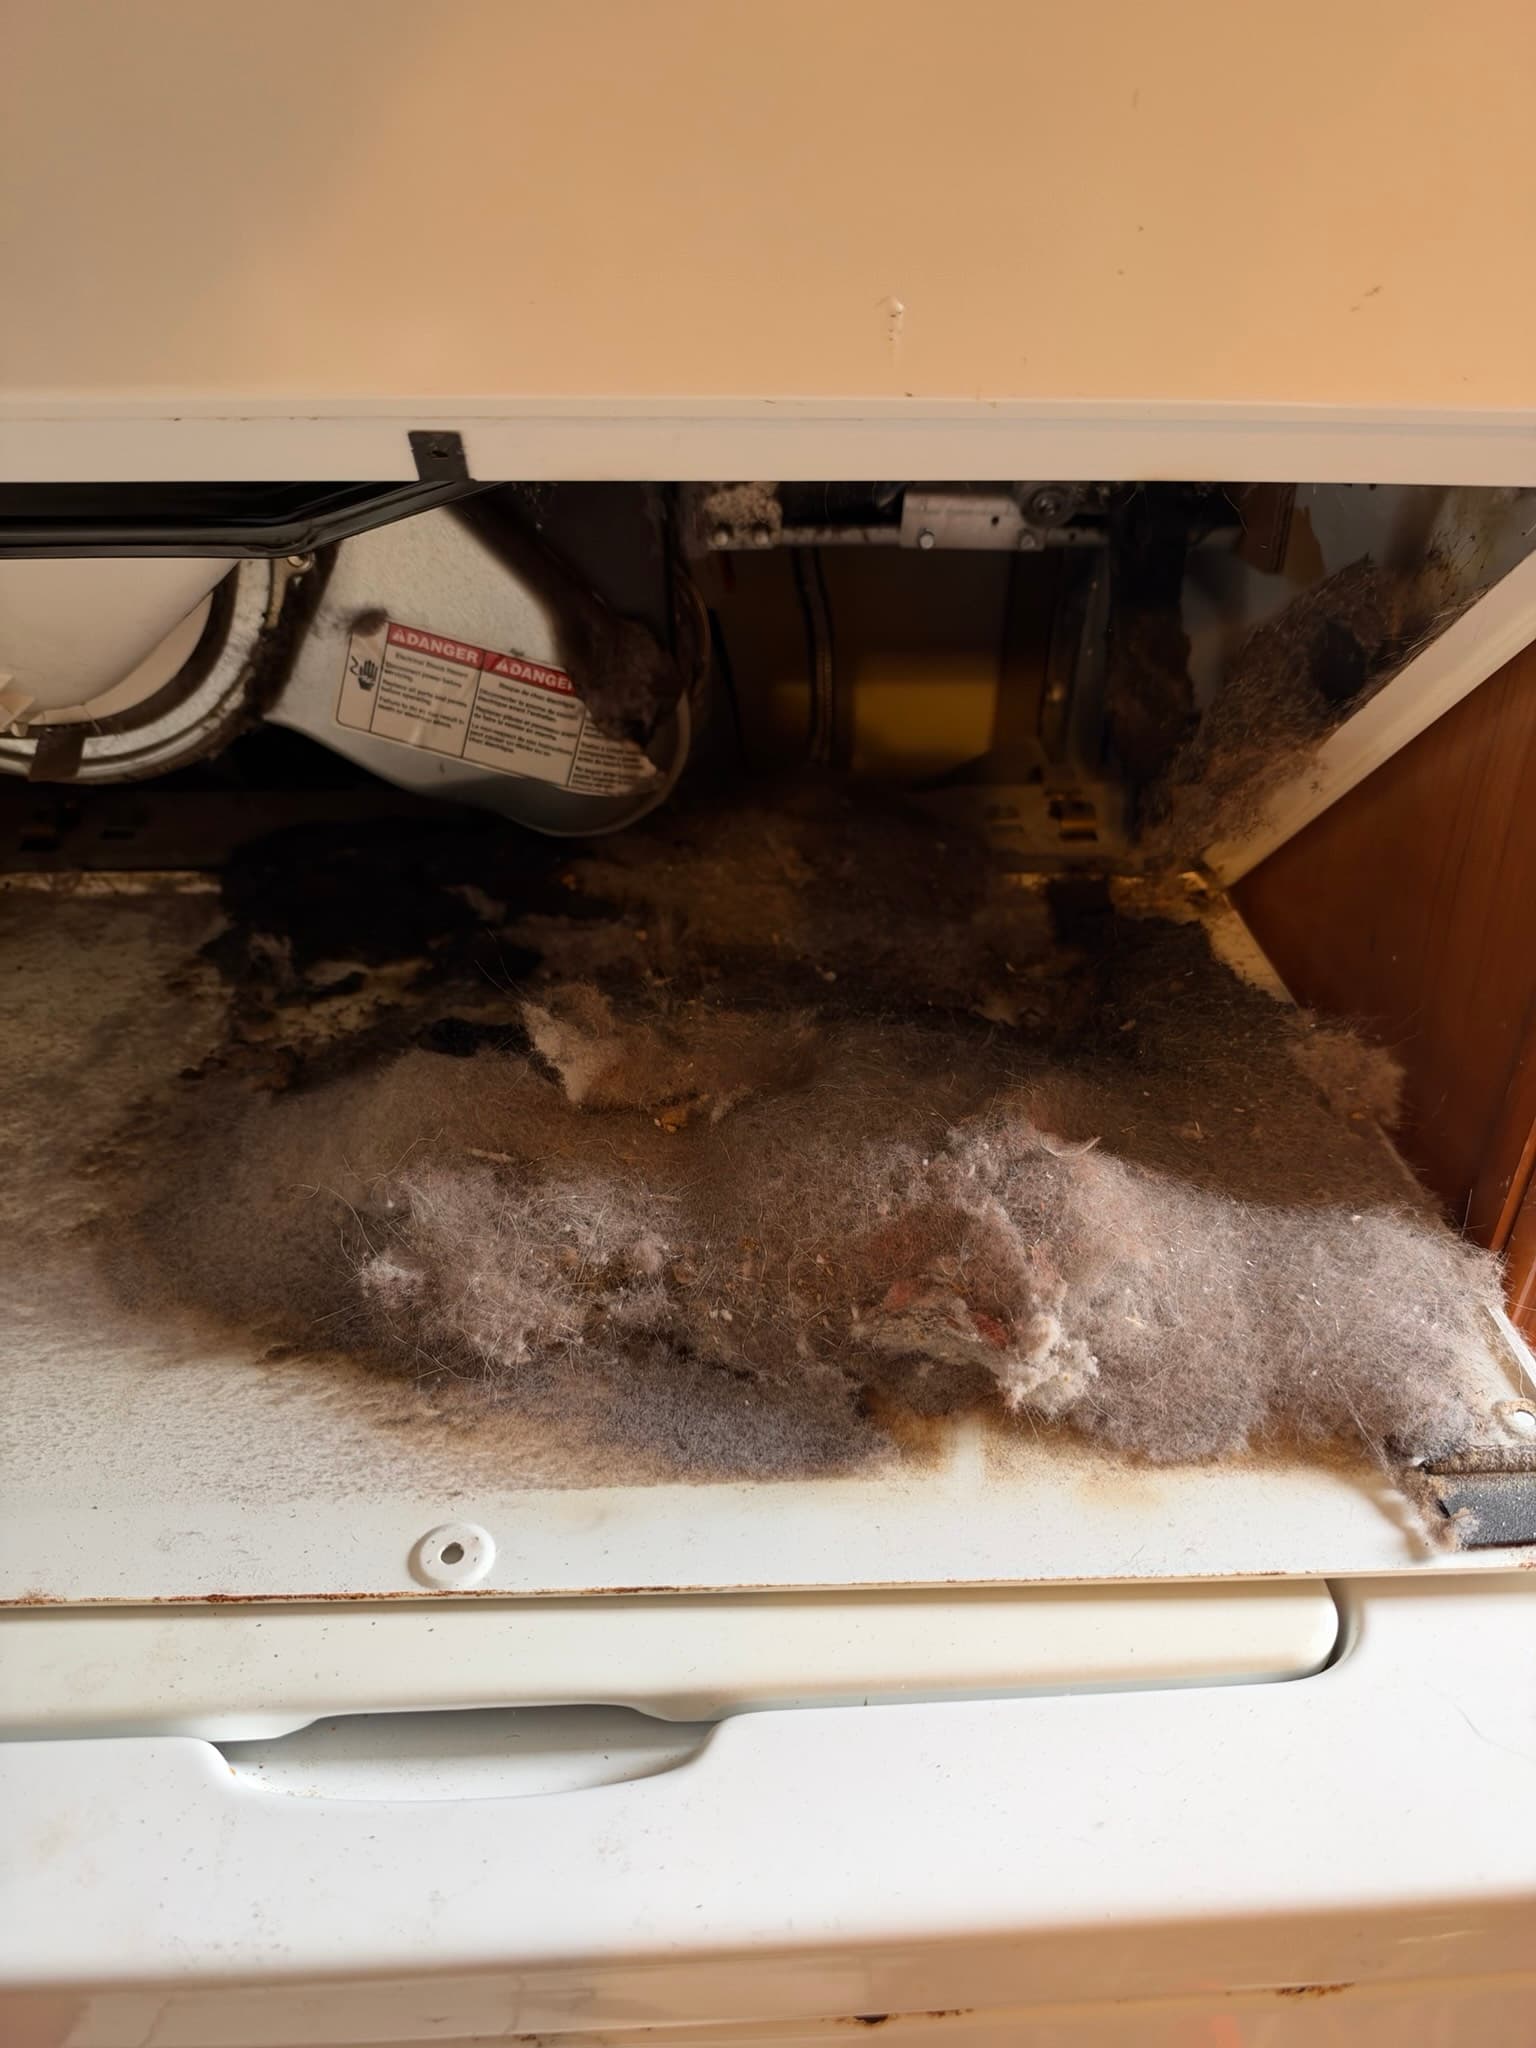
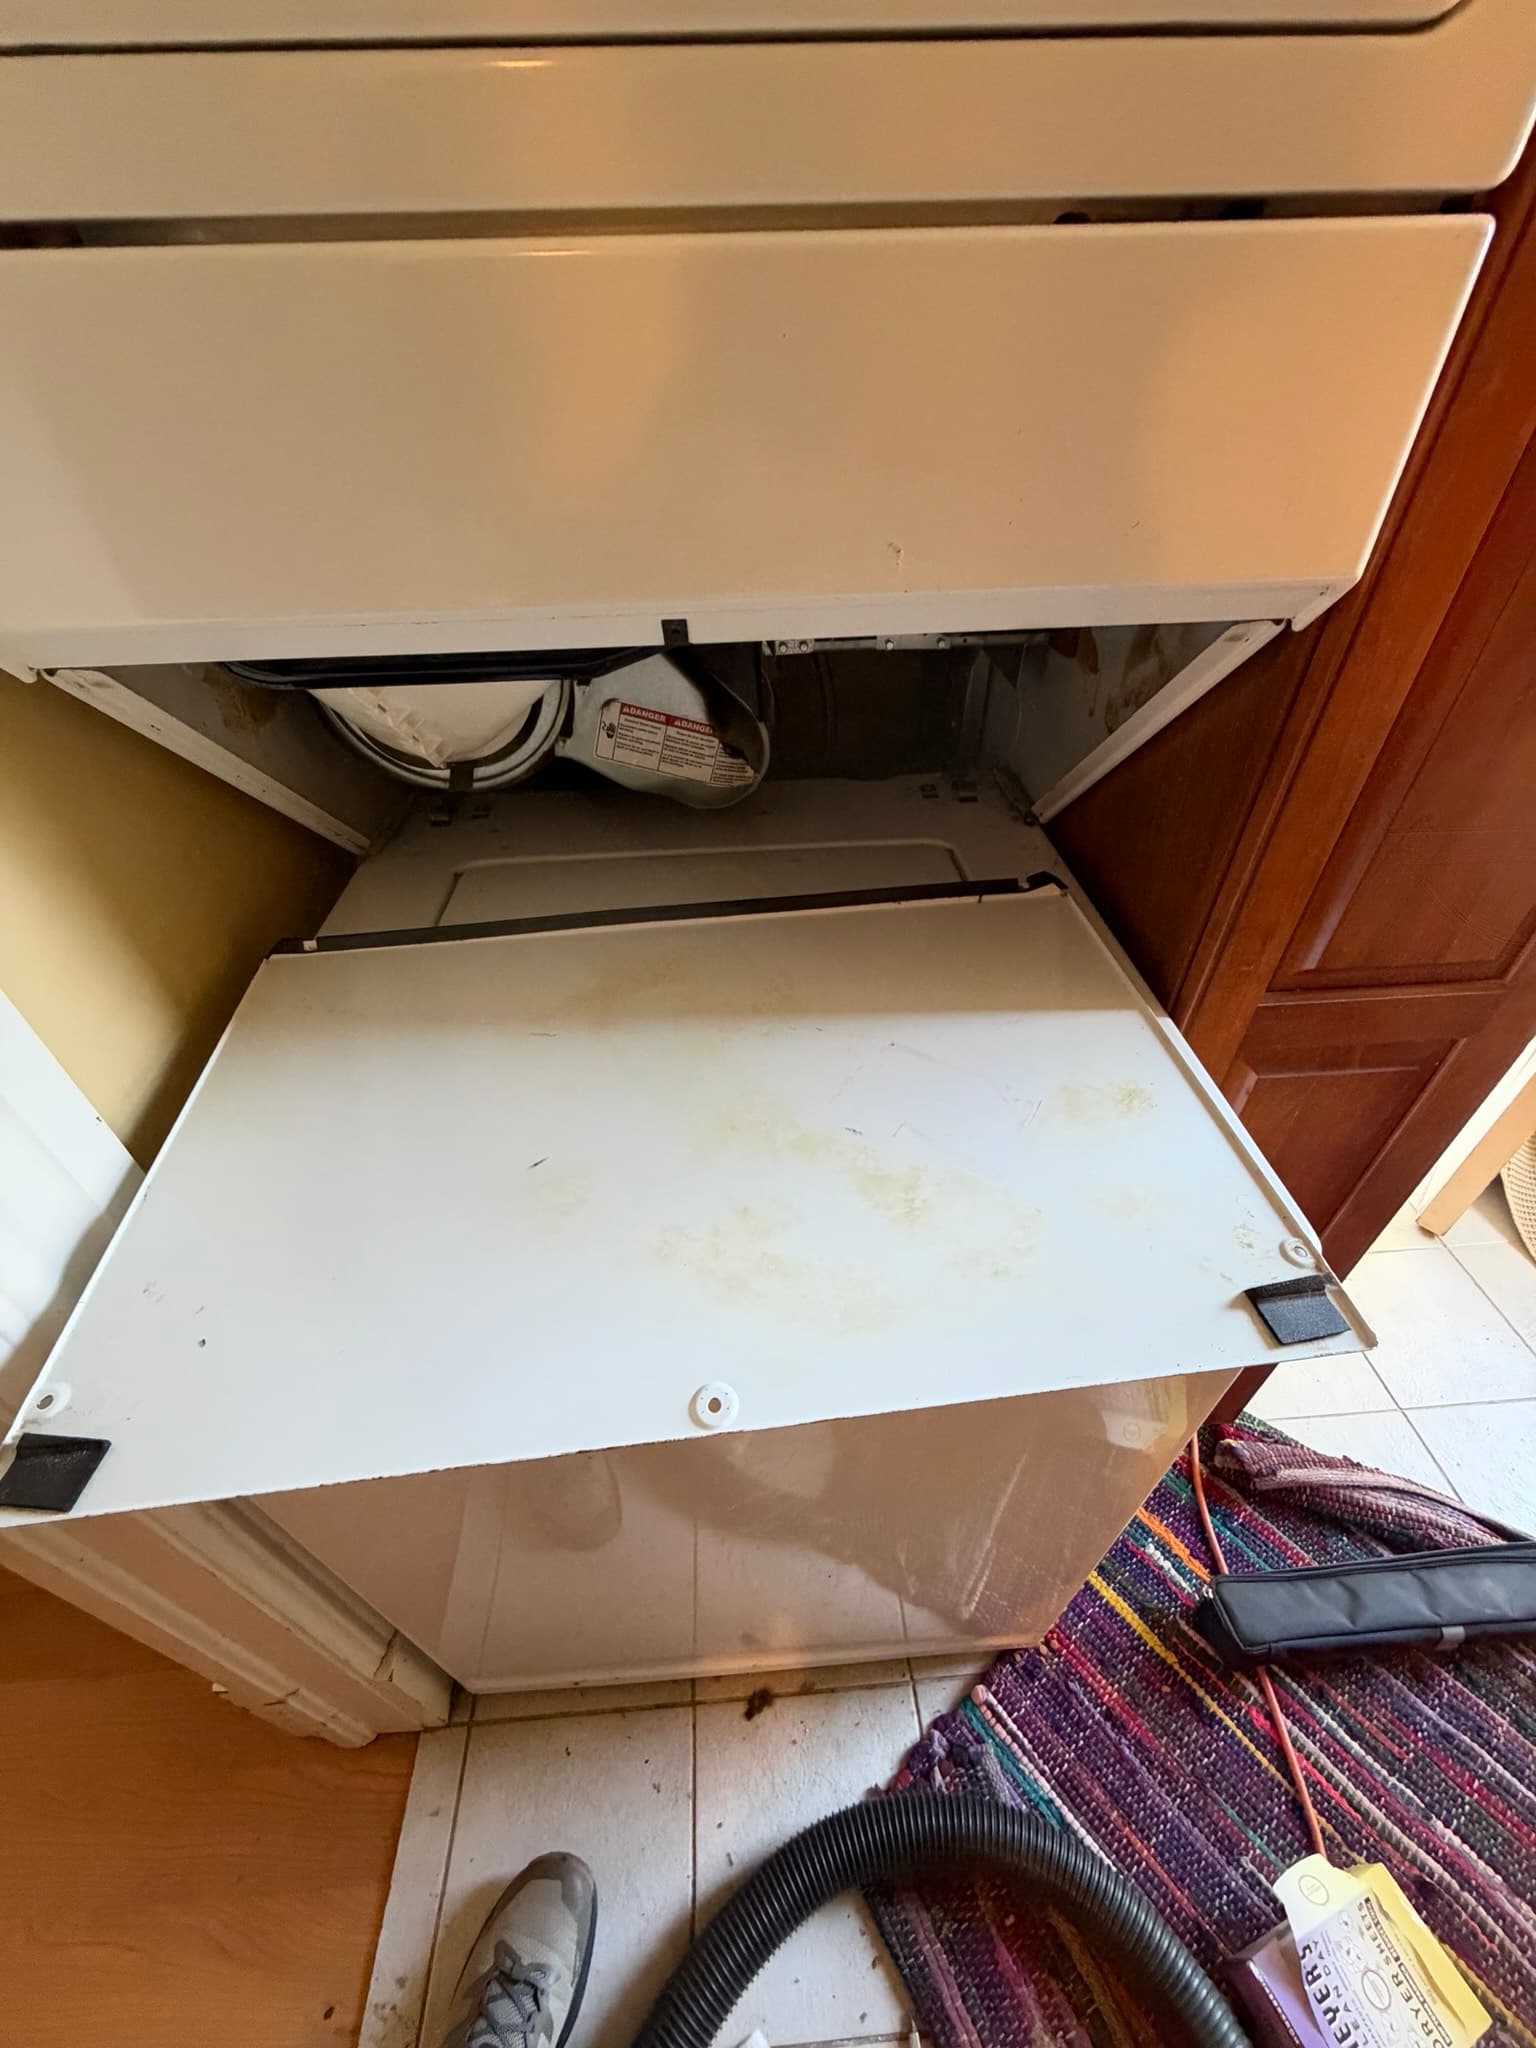
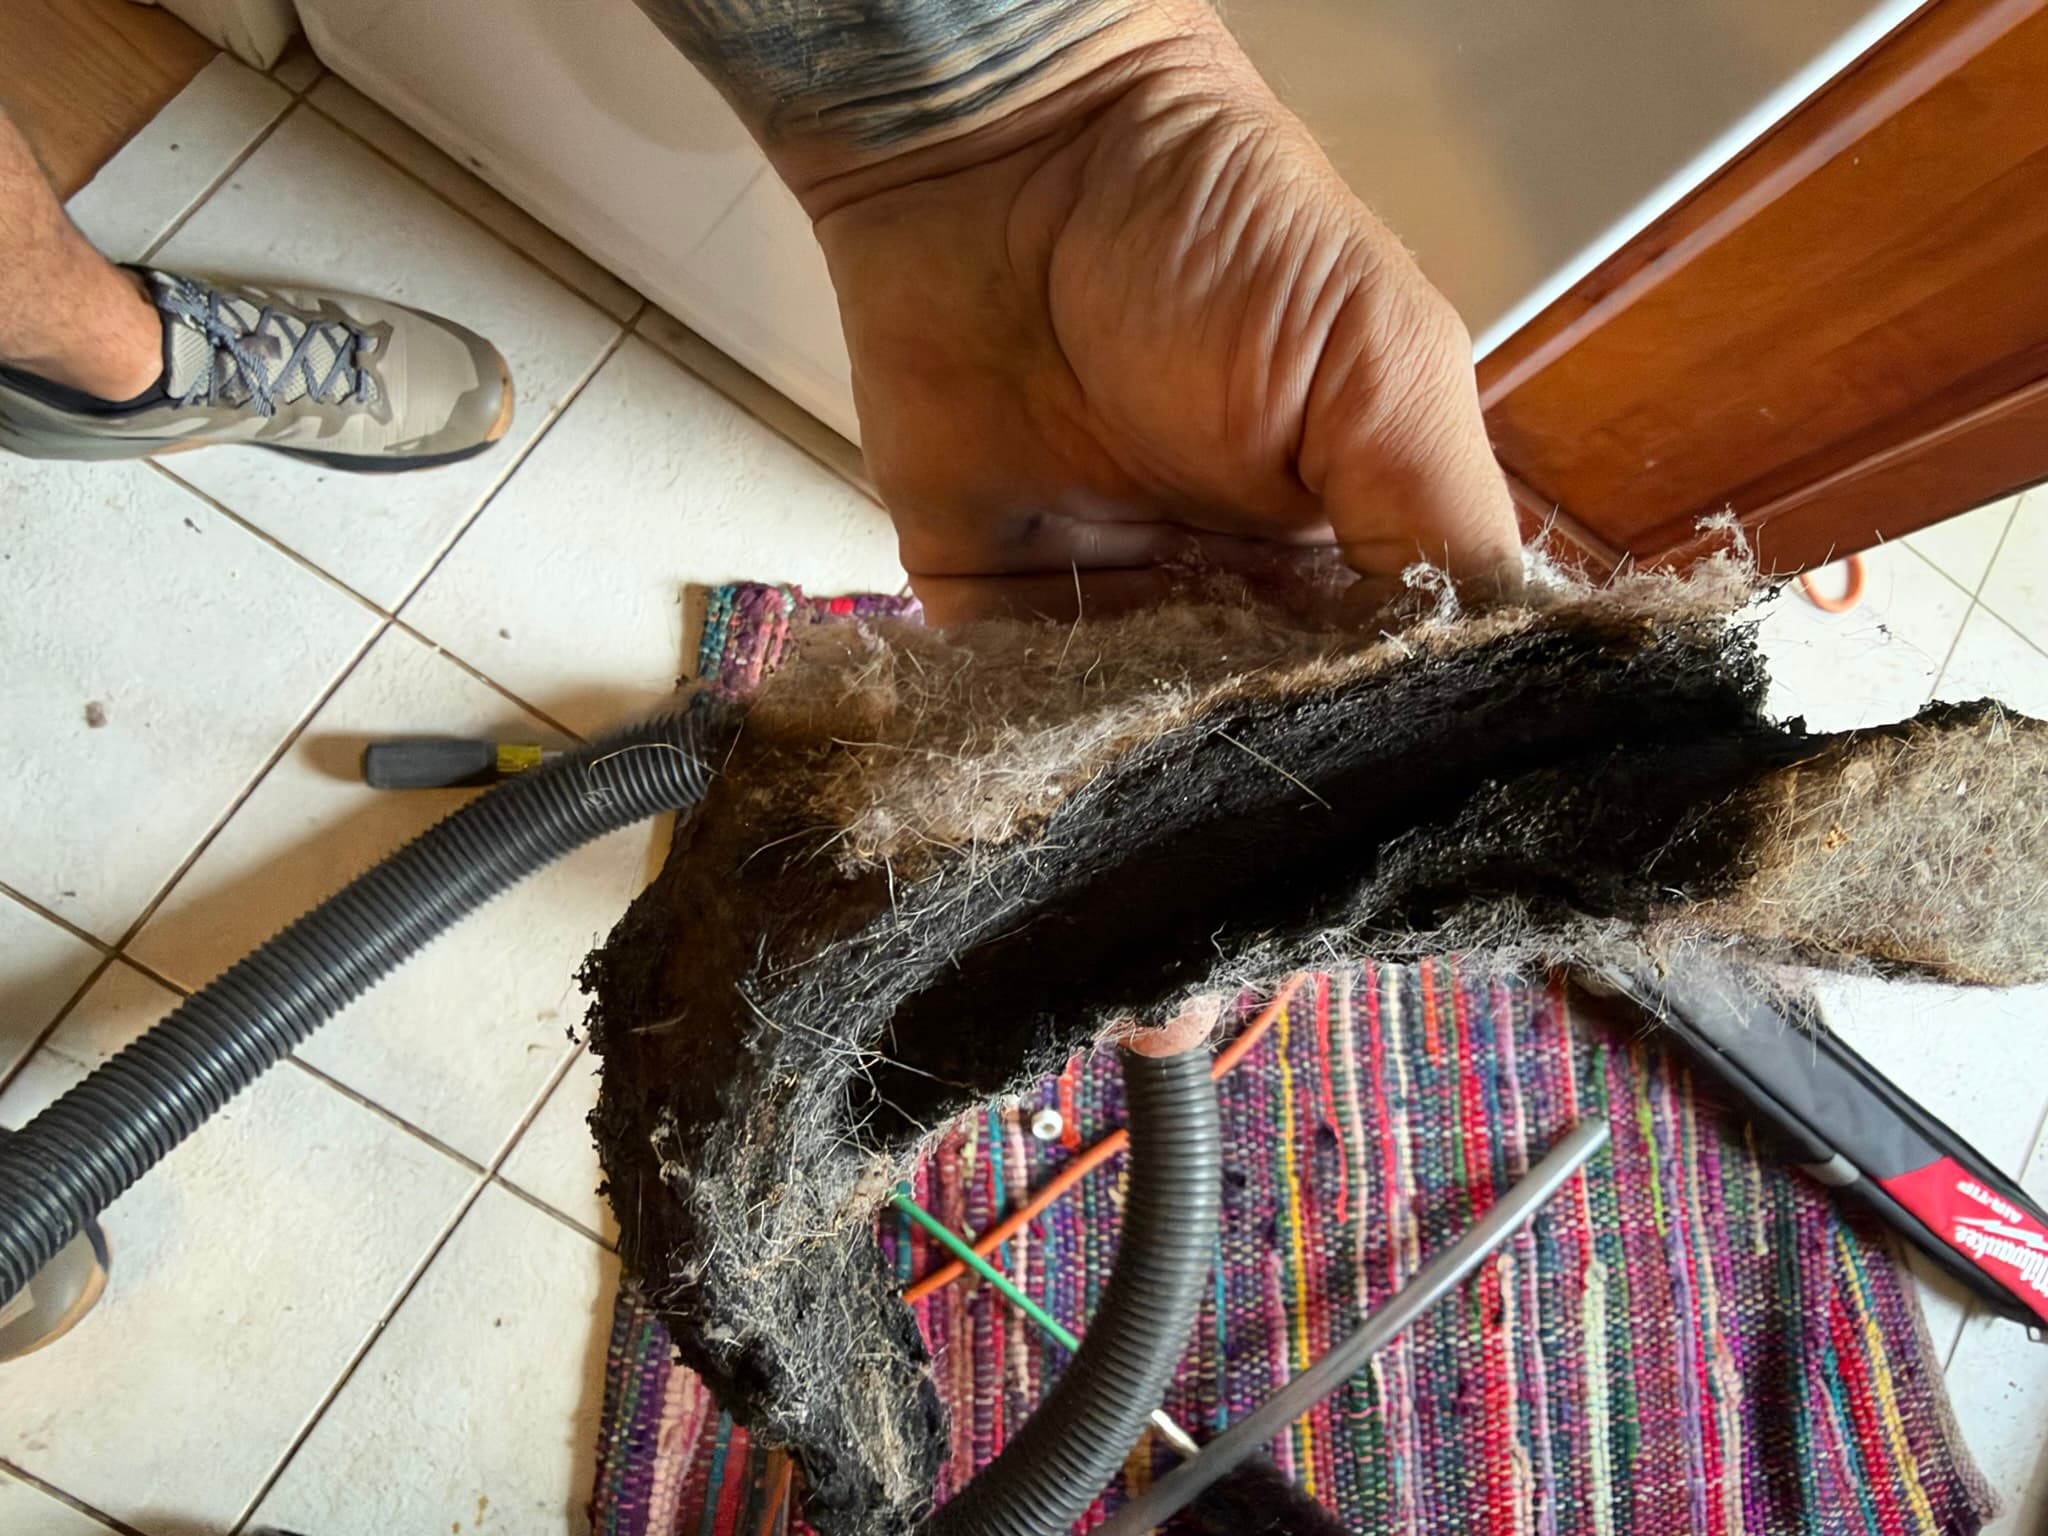
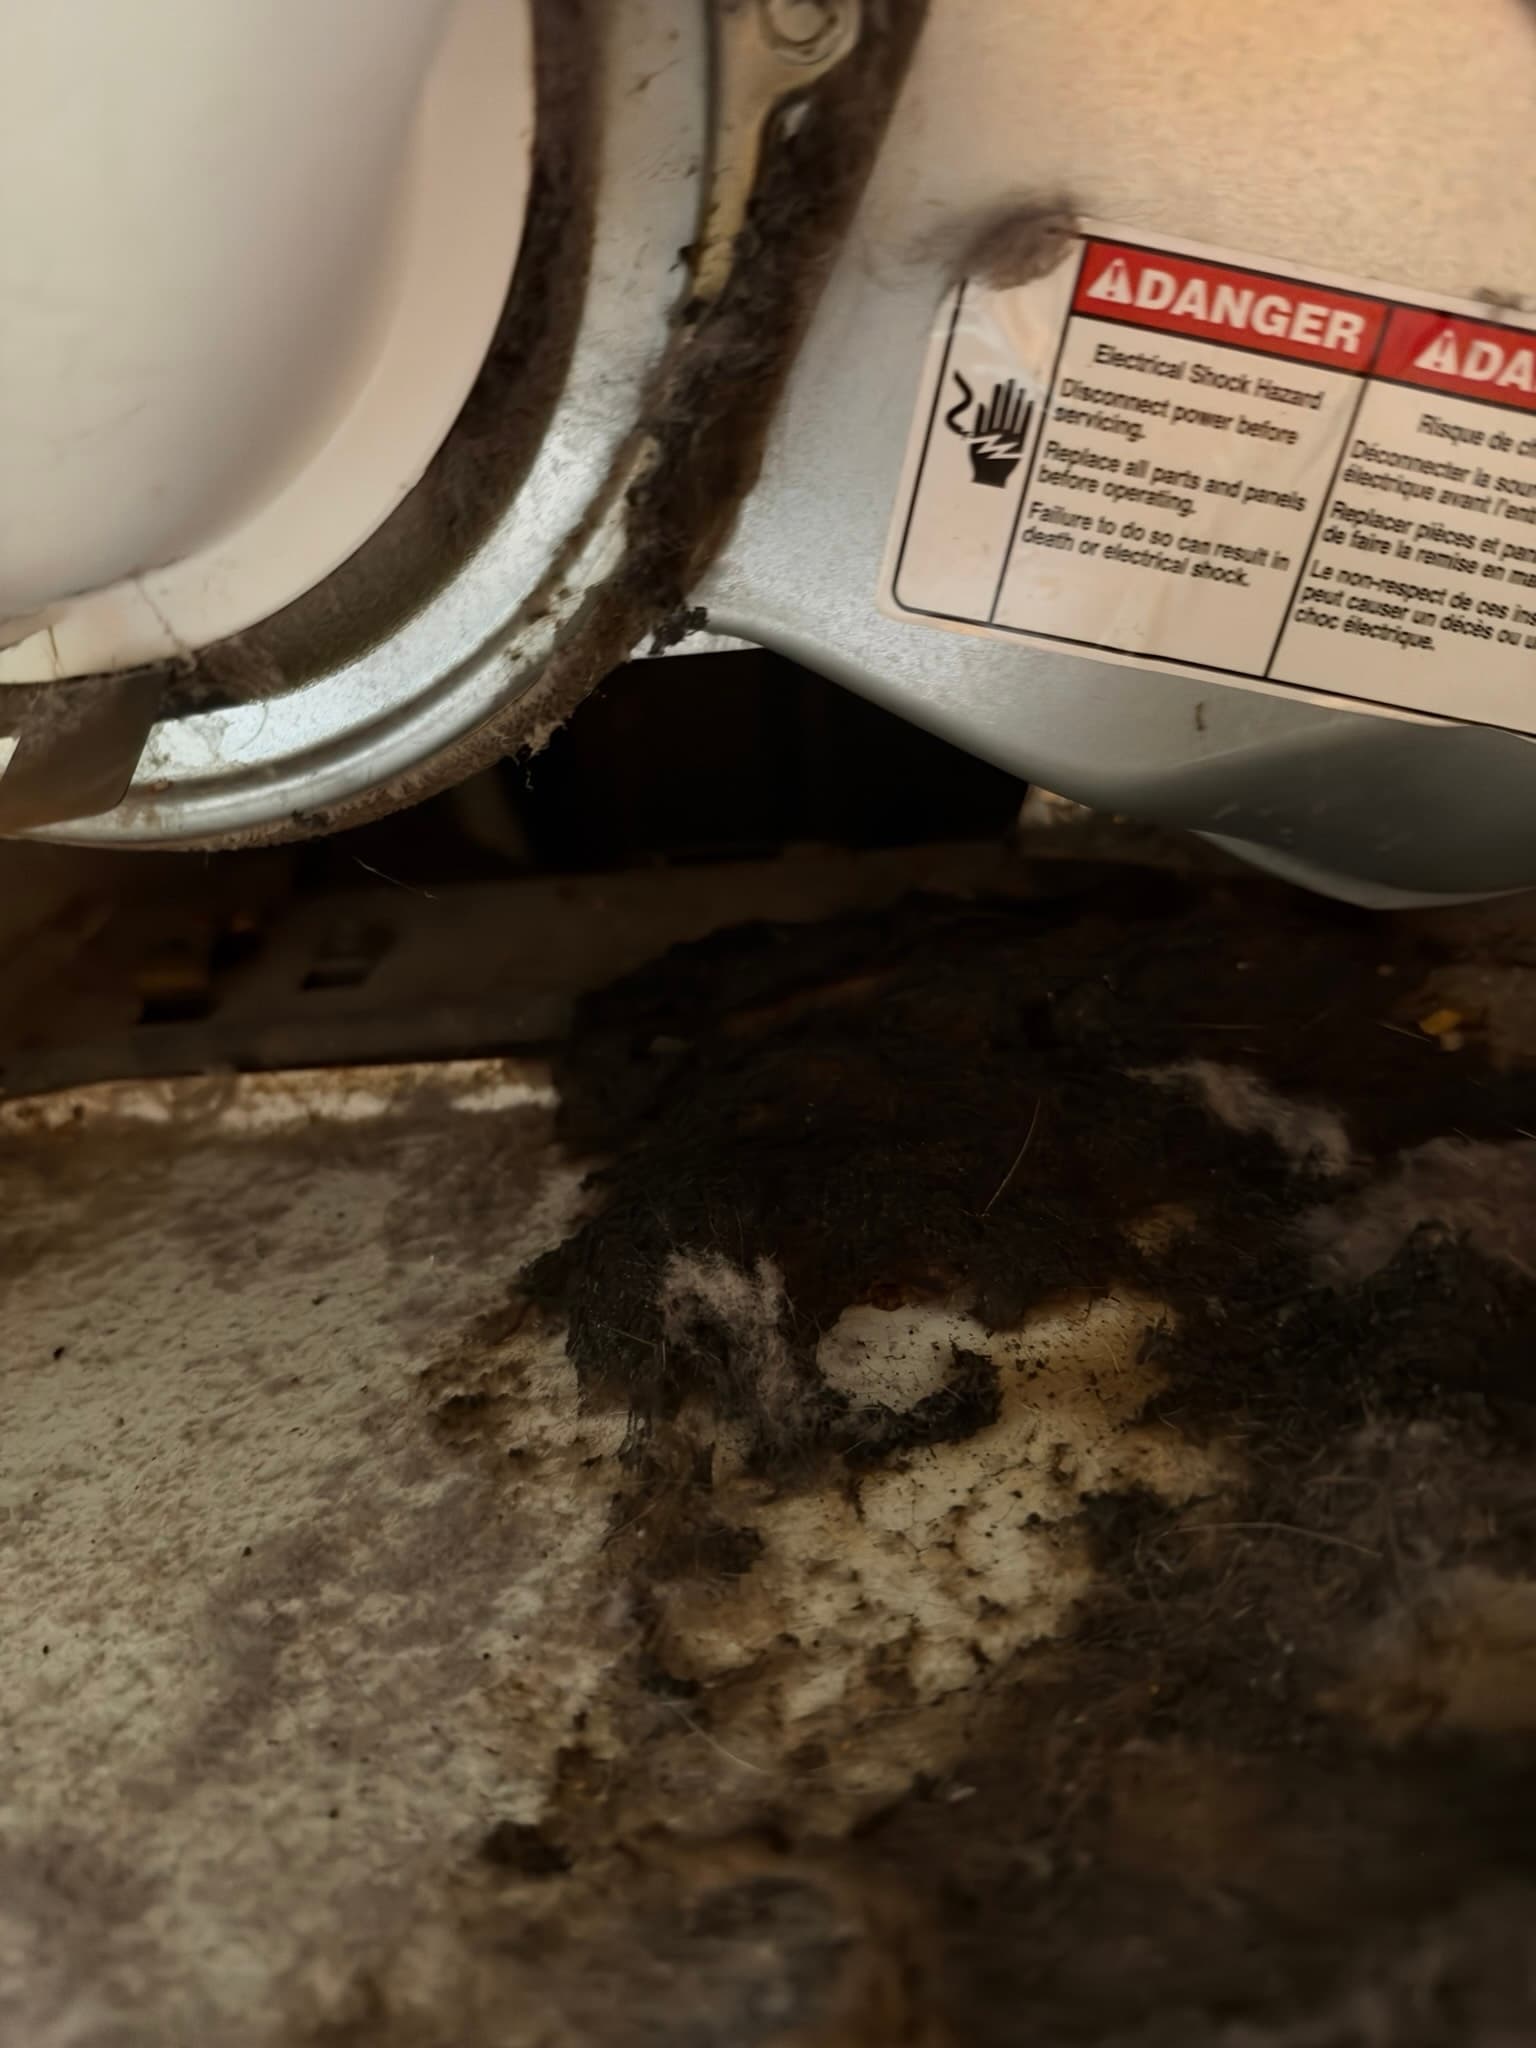
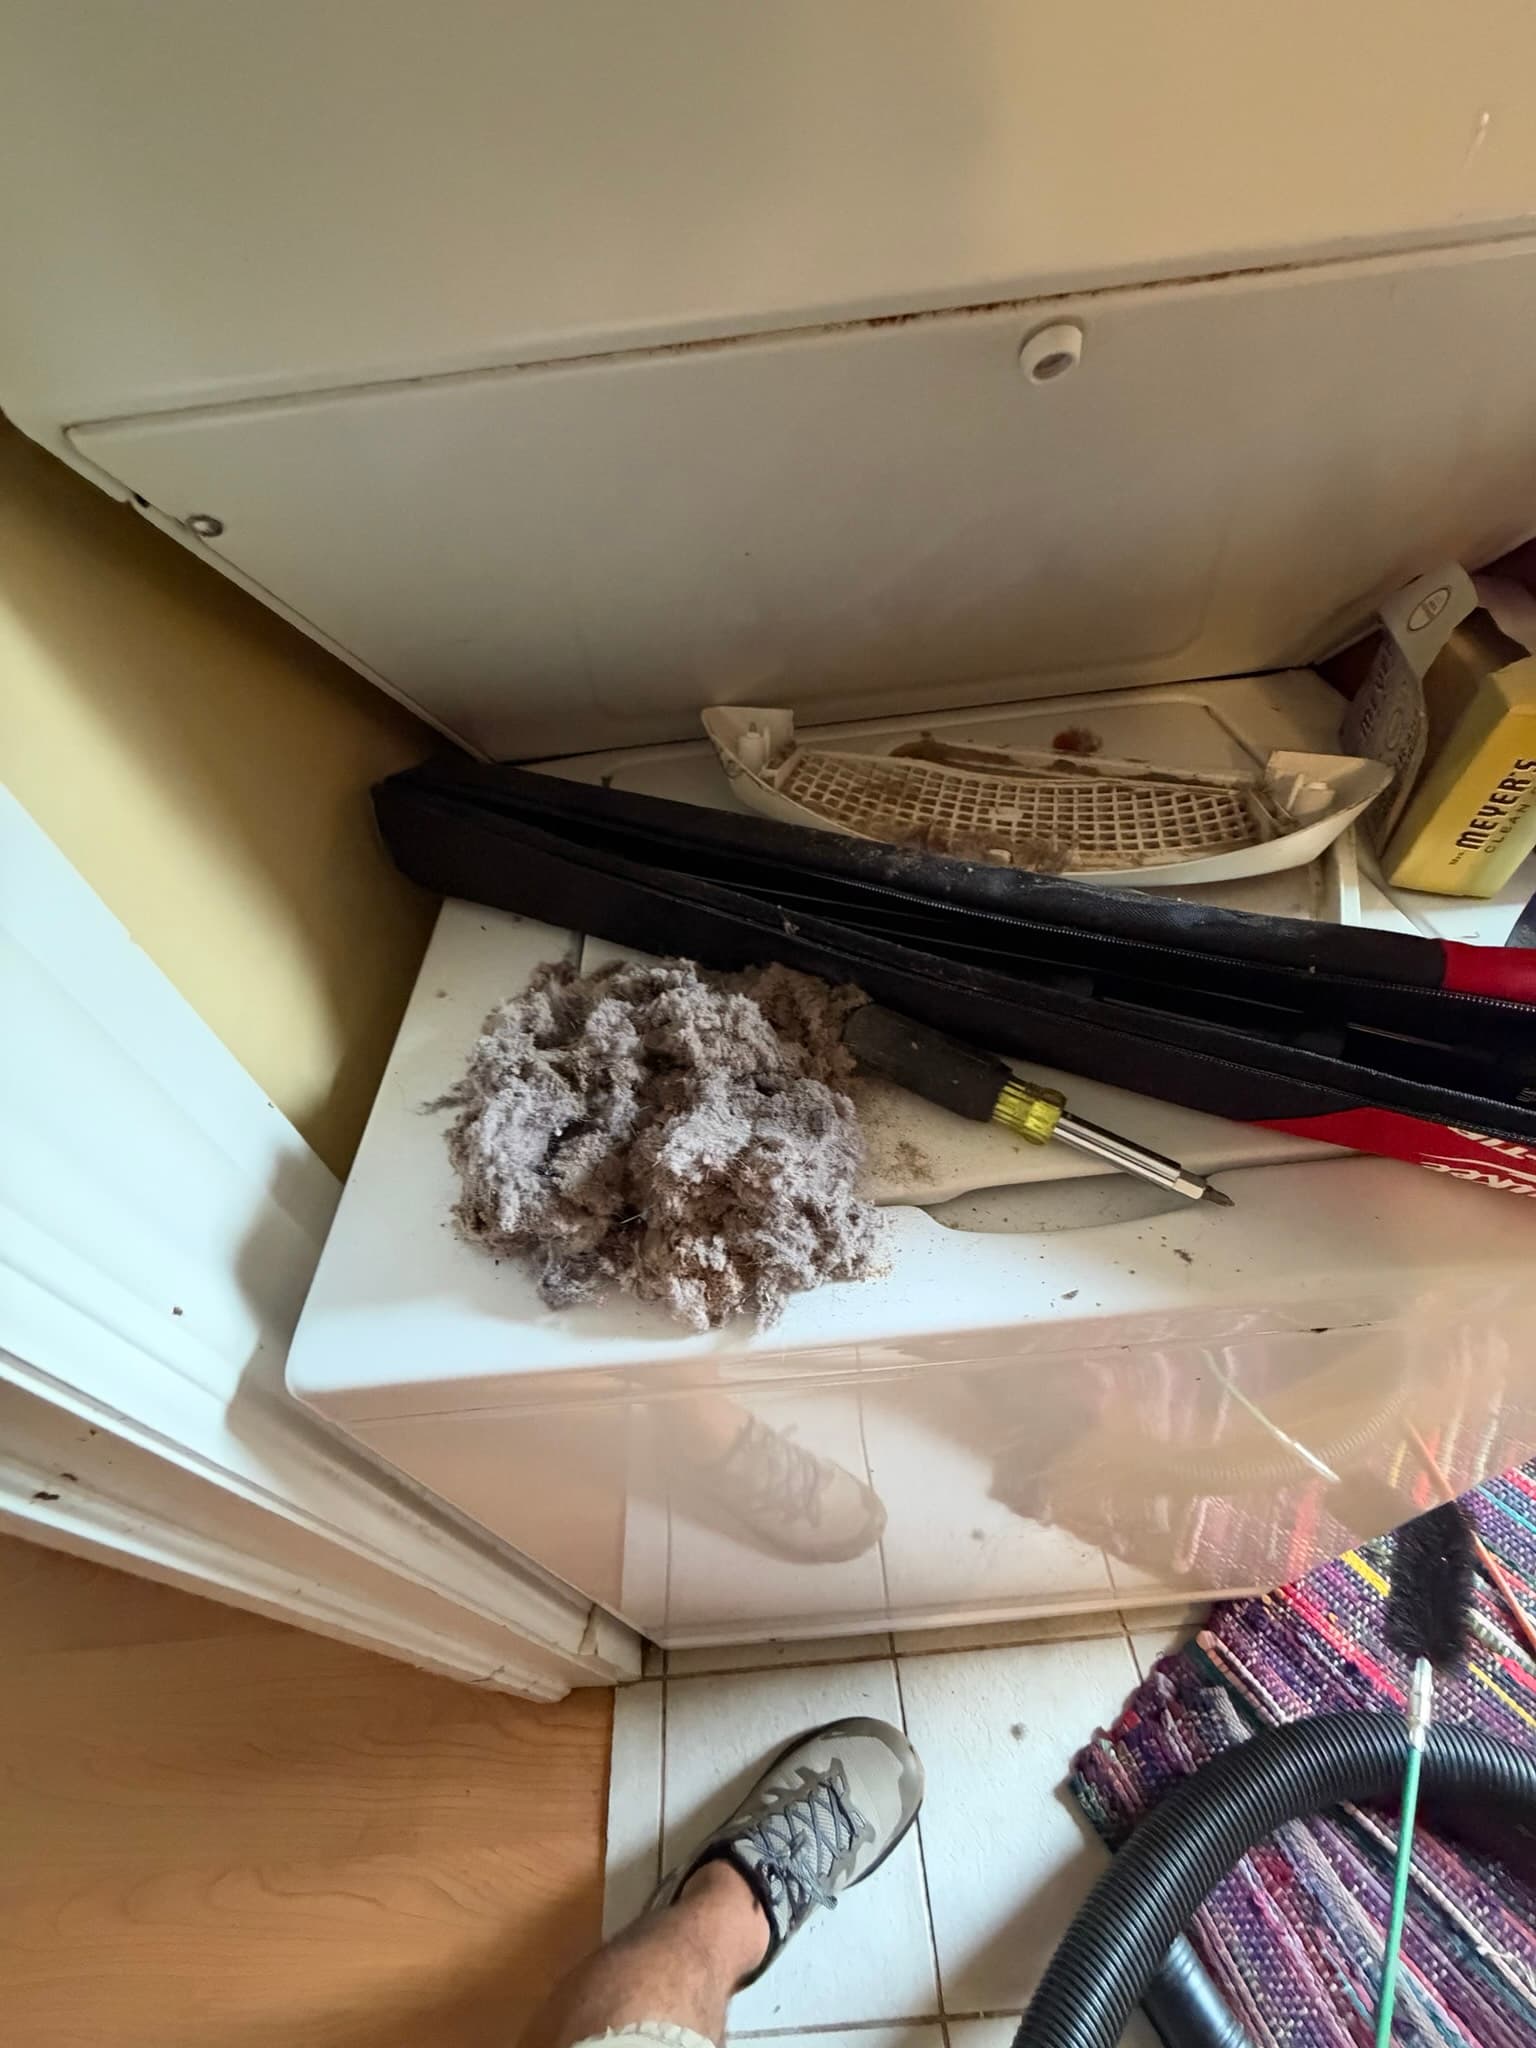
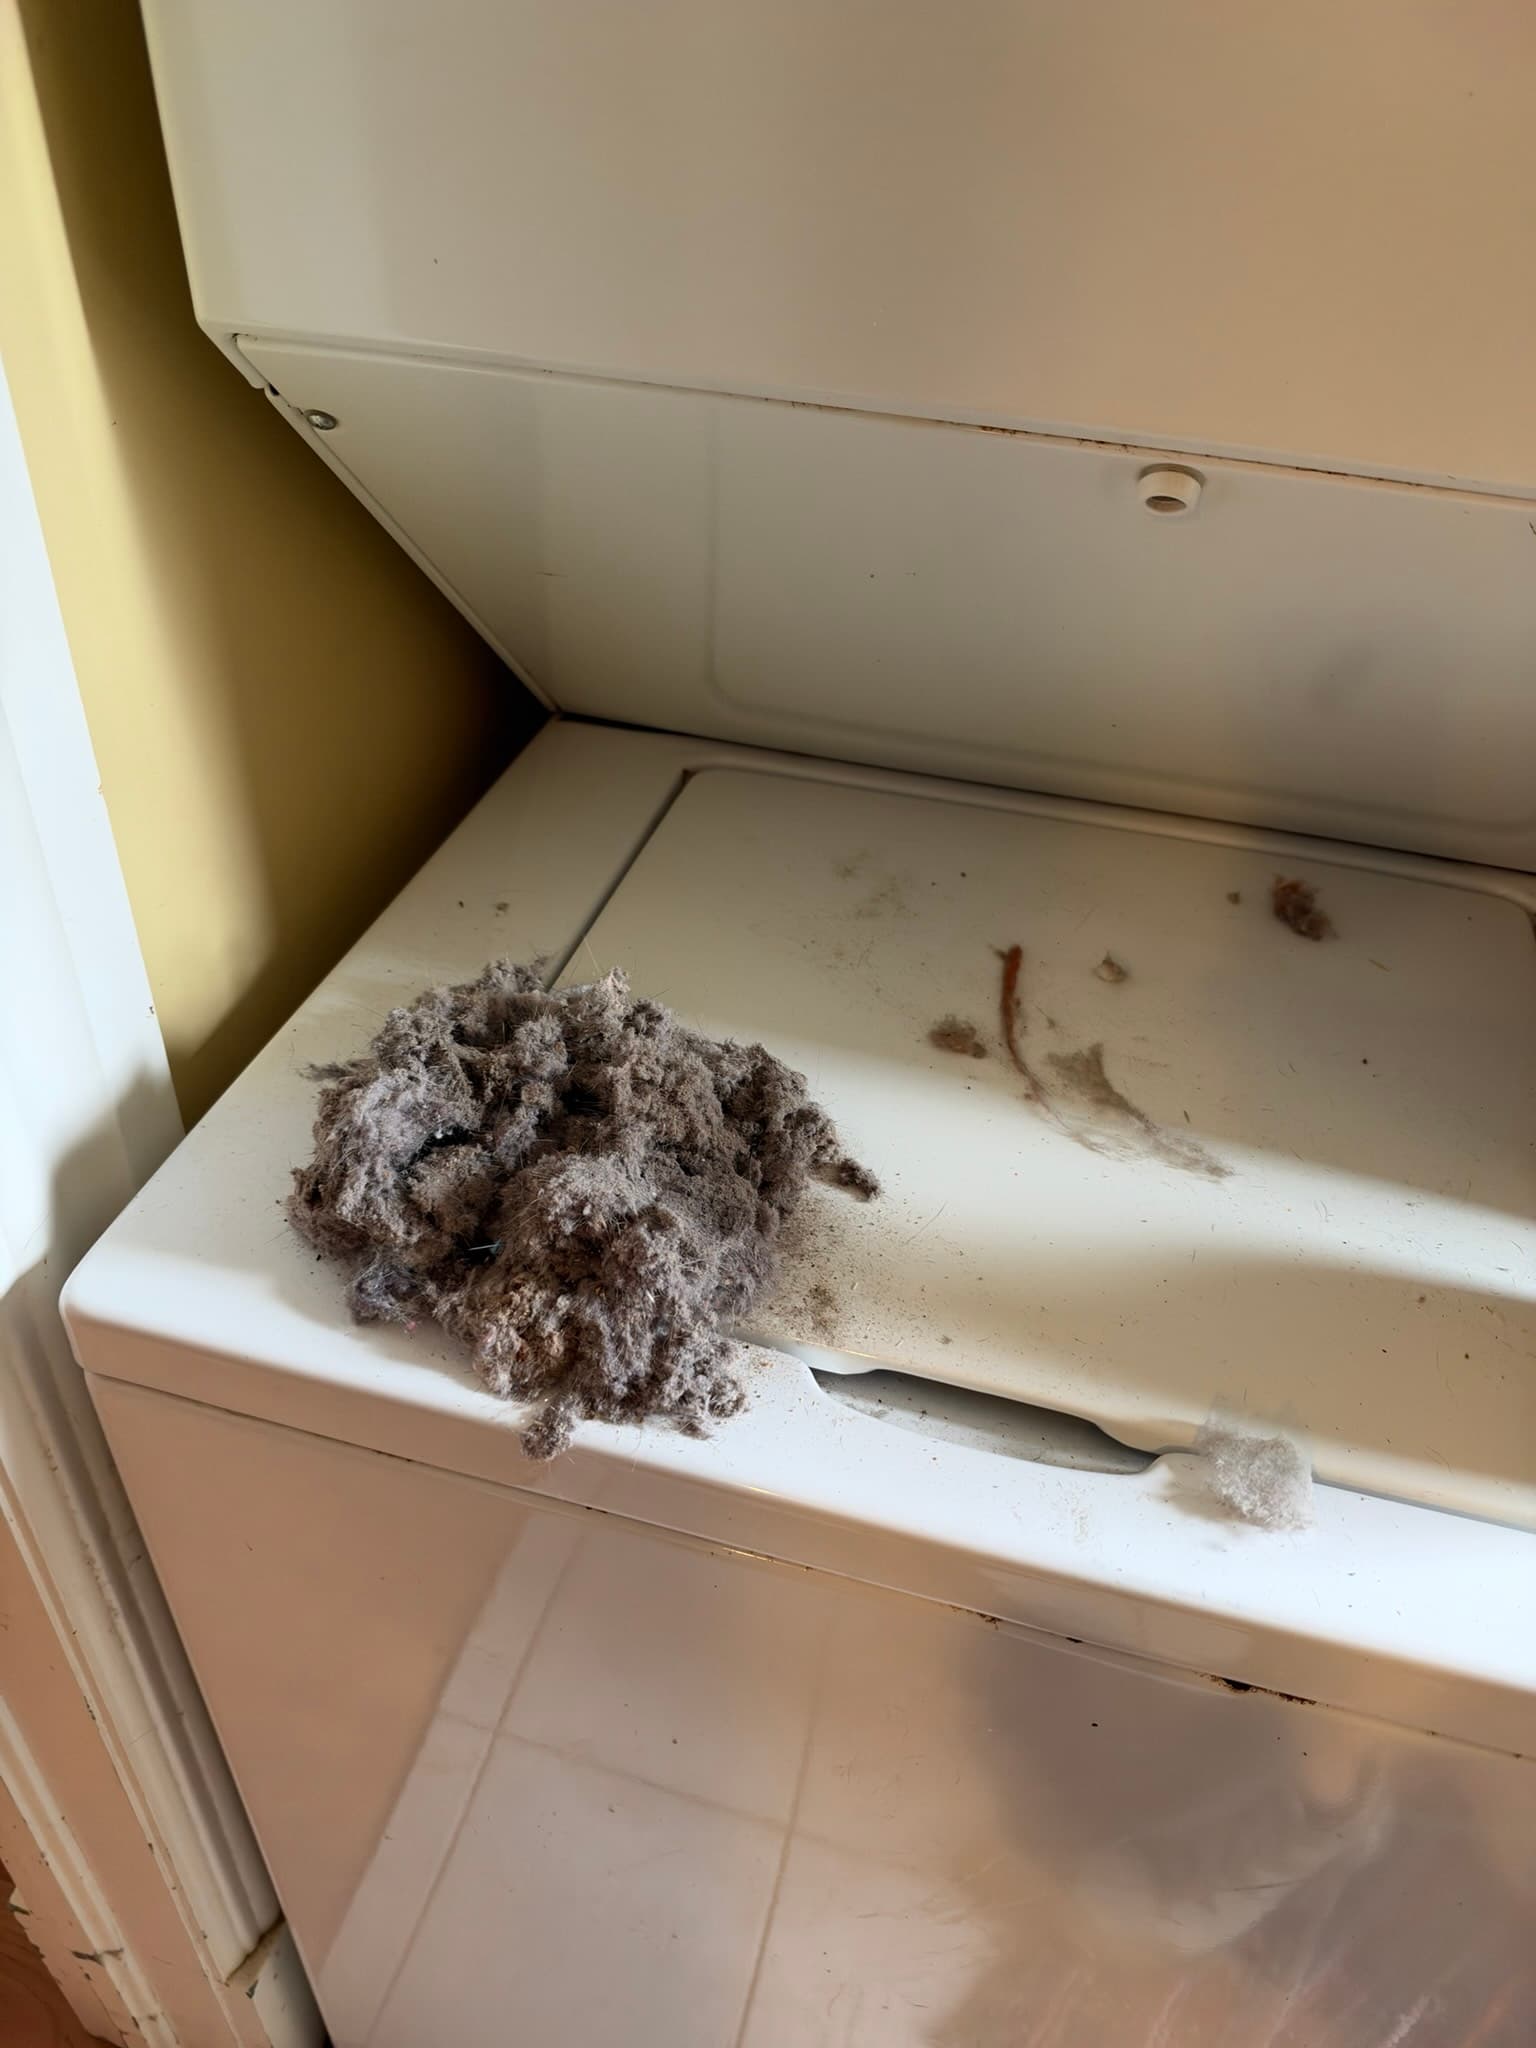
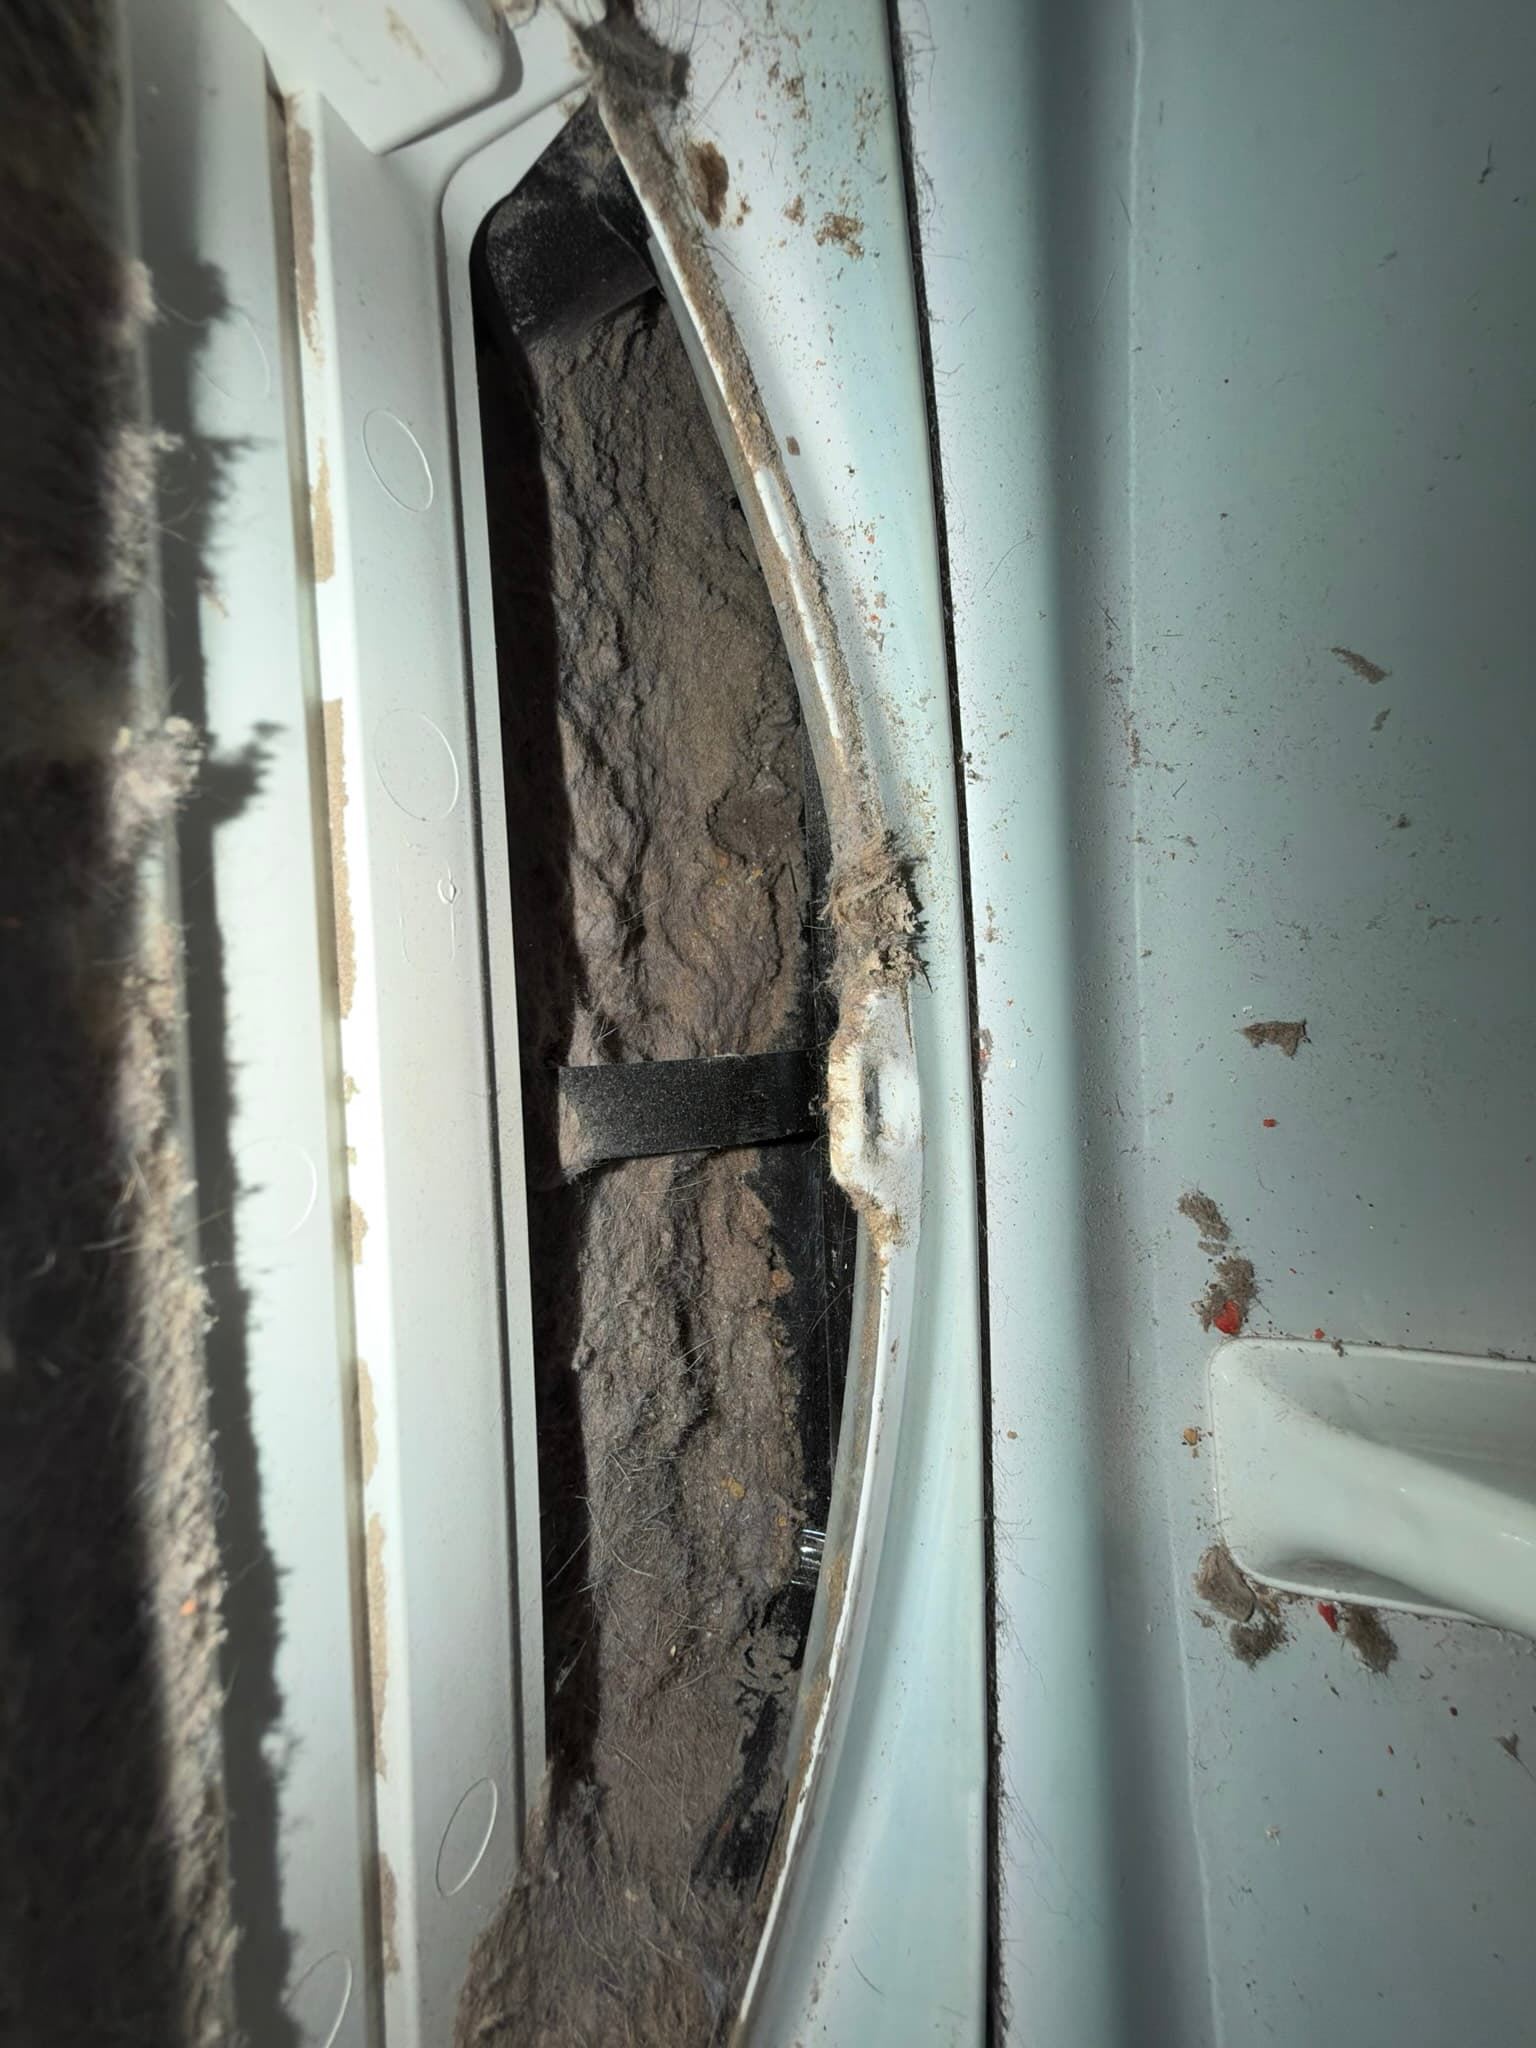
During a scheduled residential dryer exhaust cleaning and inspection in Pacifica, our technician pulled the dryer from its connection point to access the full exhaust path, from the appliance connection to the exterior termination. What we found inside the cabinet was more serious than typical seasonal buildup. Lint had migrated well beyond the duct itself and packed directly against the gas burner compartment, igniter wiring, and gas valve solenoid bracket. A dense, felted mat of lint coated the cabinet floor, climbed the rear wall, and surrounded the blower housing. When we extracted the transition duct connection, we pulled a solid, compacted sheet of lint with a dark core and sections charred black from heat exposure, confirming that duct temperatures had been running well above normal. This level of accumulation, lint packed against an active gas burner and igniter, is consistent with severe lint buildup as described by national fire data: the U.S. Fire Administration attributes a large share of the approximately 15,000 home dryer fires reported annually to exactly this kind of neglected buildup. During our walkthrough with the homeowner, we also flagged several related concerns outside the scope of this cleaning visit: the exterior vent hood is missing its louvers, the existing hard pipe is not sealed with foil tape at the joints, and the current transition duct is not listed to UL 2158A, the safety standard that requires transition ducts to withstand dryer exhaust heat without degrading.
What We Did
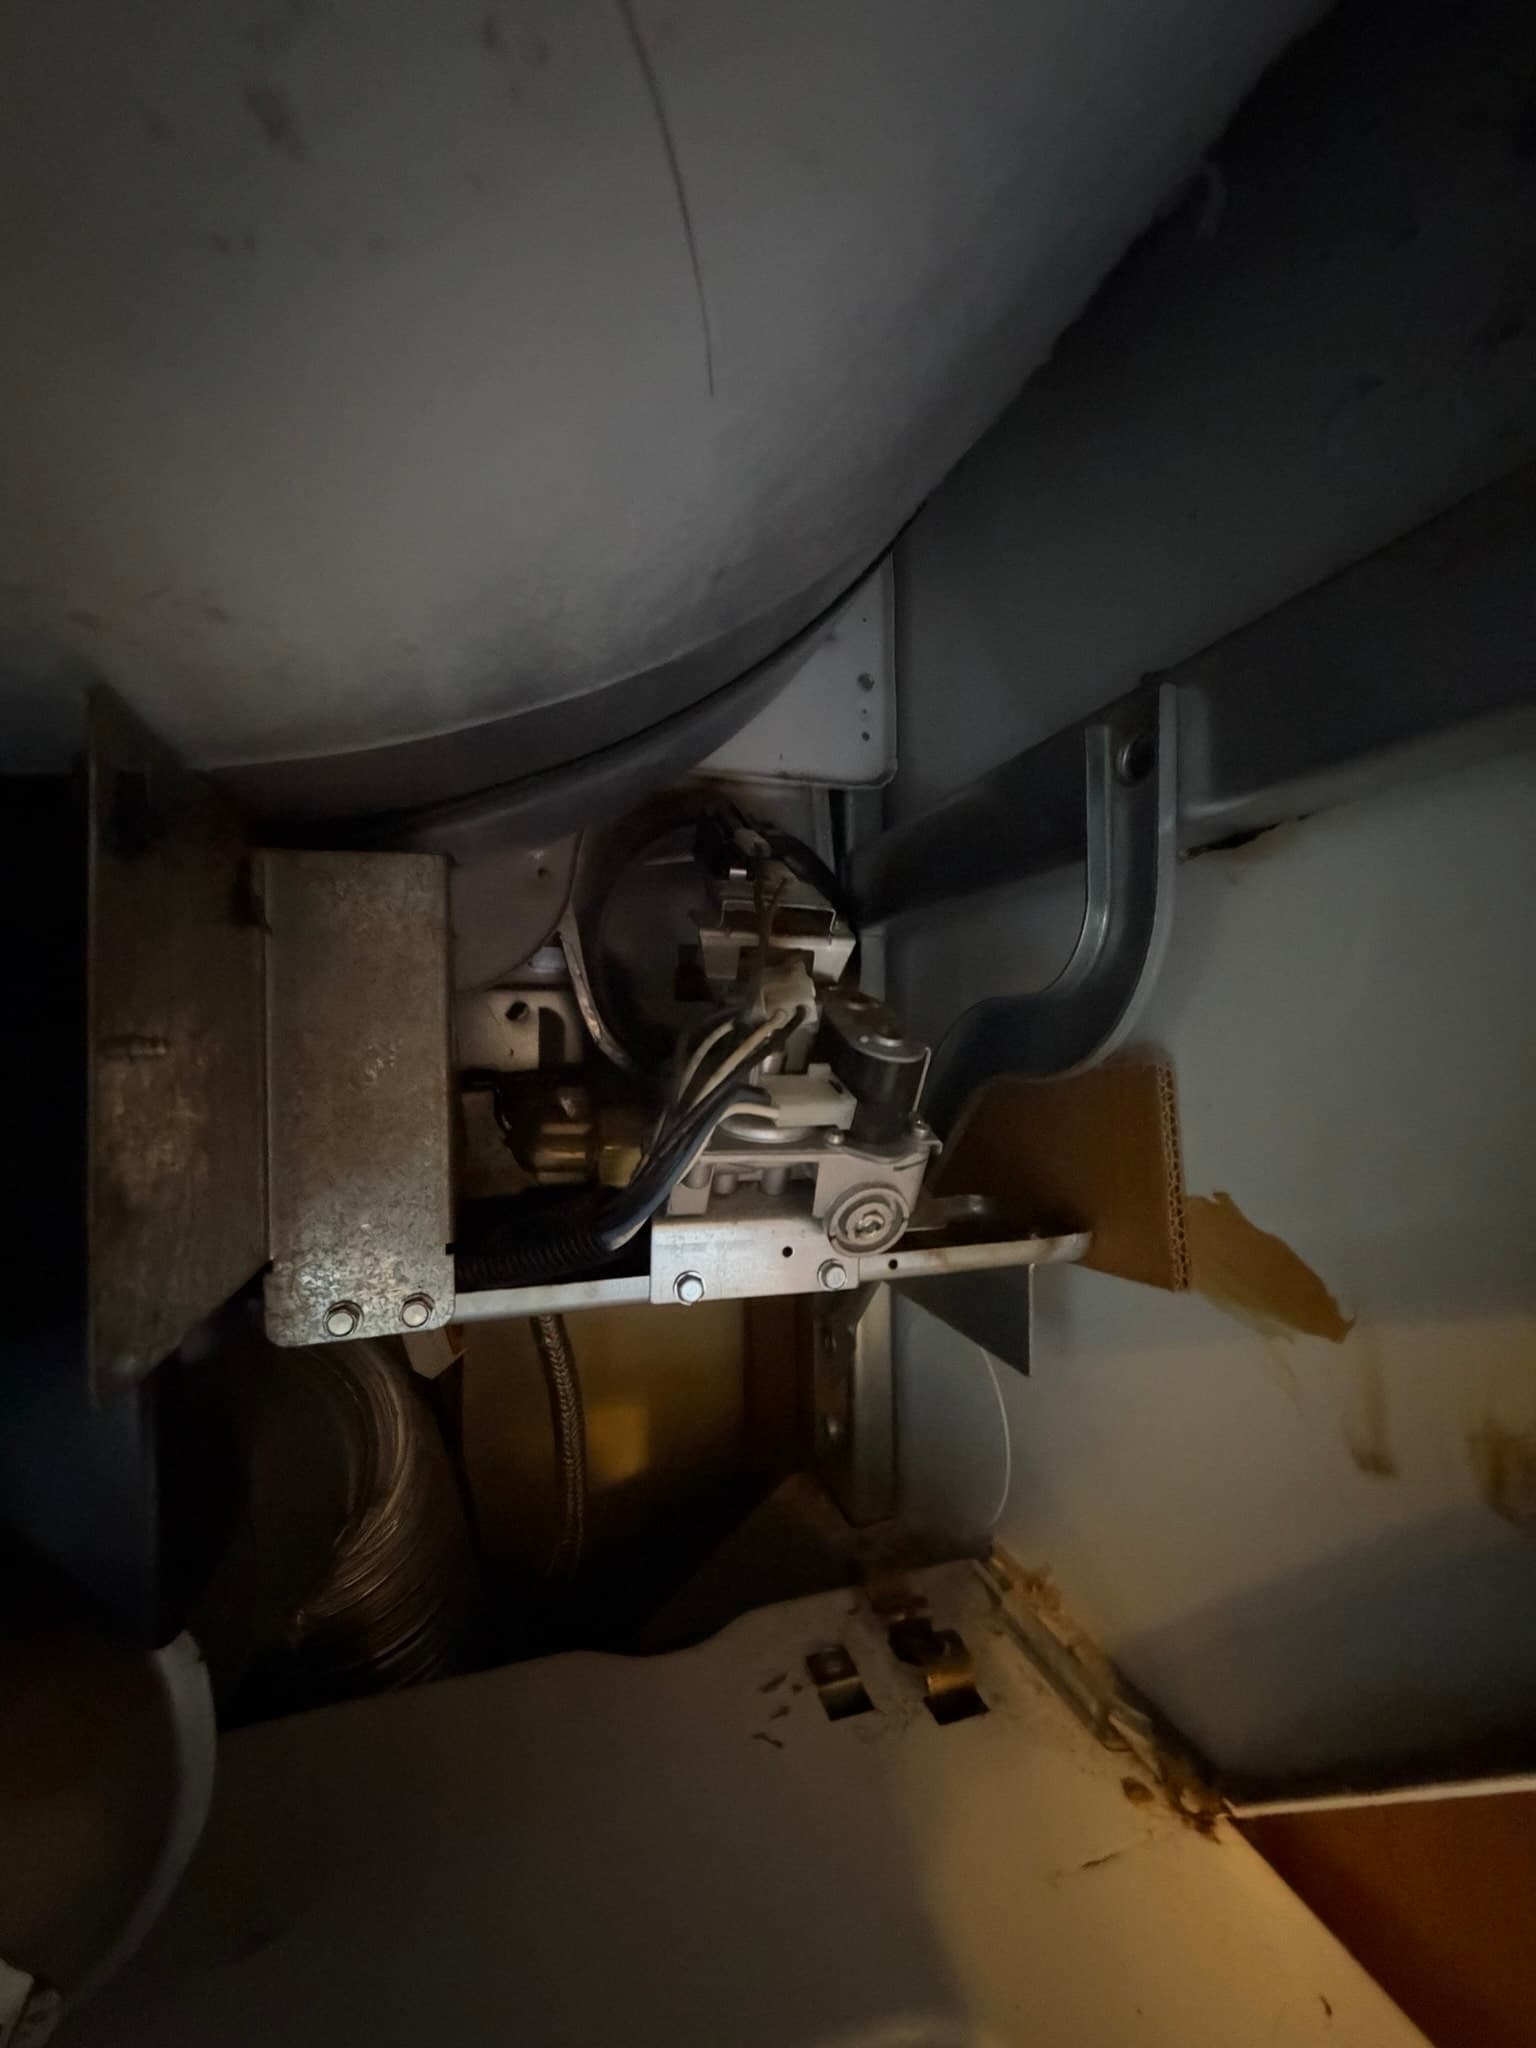
This visit was billed as a full Residential Dryer Exhaust Cleaning and Inspection with a complete interior cleanout, reflecting the scope of lint found well beyond the duct run itself. We used a drill-attachment rotary brush combined with a high-powered shop vacuum to break up and extract the compacted lint mat from the transition duct connection, the lint trap housing, and the full length of the exhaust path out to the exterior termination point. Because the lint accumulation extended into the mechanical compartment, we also cleared the material packed around the drum motor assembly, the blower housing, the gas valve bracket, and the igniter wiring, areas that a standard duct-only cleaning would not reach. The lint trap housing itself was caked solid and was cleaned down to bare metal. Once the cabinet interior and duct run were clear, we performed an airflow test to verify the exhaust path was moving air properly from the dryer connection through to the exterior cap, confirming the blockage had been fully resolved rather than just reduced.
The Outcome
After the cleaning, the dryer cabinet, burner compartment, wiring, and duct connection were fully visible and free of lint, a dramatic change from the matted, floor-to-wall buildup documented before service. Removing lint from direct contact with the gas burner and igniter addresses both the fire risk and the carbon monoxide exposure risk that this kind of buildup creates around a gas appliance. With the duct cleared, the dryer will run more efficiently, heat up less at the exhaust connection, and no longer force the motor to work against a restricted airflow path. We discussed the other items noted during the inspection, the missing vent hood louvers, the unsealed hard pipe joints, and the non-UL 2158A transition duct, with the homeowner as separate follow-up work, since they fall outside the scope of a cleaning and inspection visit and involve material replacement rather than lint removal. For now, the system has been cleaned and inspected end to end, and airflow has been verified at the dryer connection. Homeowners in coastal Pacifica, where marine humidity can accelerate lint compaction inside ducts, should plan on at least an annual professional cleaning to prevent this level of buildup from recurring.
Project photos
12 photos

Need similar work in Pacifica?
Get a free quote - same-week appointments usually available.