
San Francisco · Residential Dryer Exhaust Cleaning Inspection
Dryer Vent Cleaning and Inspection in San Francisco
A San Francisco residence received a full dryer exhaust cleaning and inspection after severe lint blockage was found throughout the duct system and dryer interior, restoring safe airflow and reducing fire risk.
Completed May 23, 2026
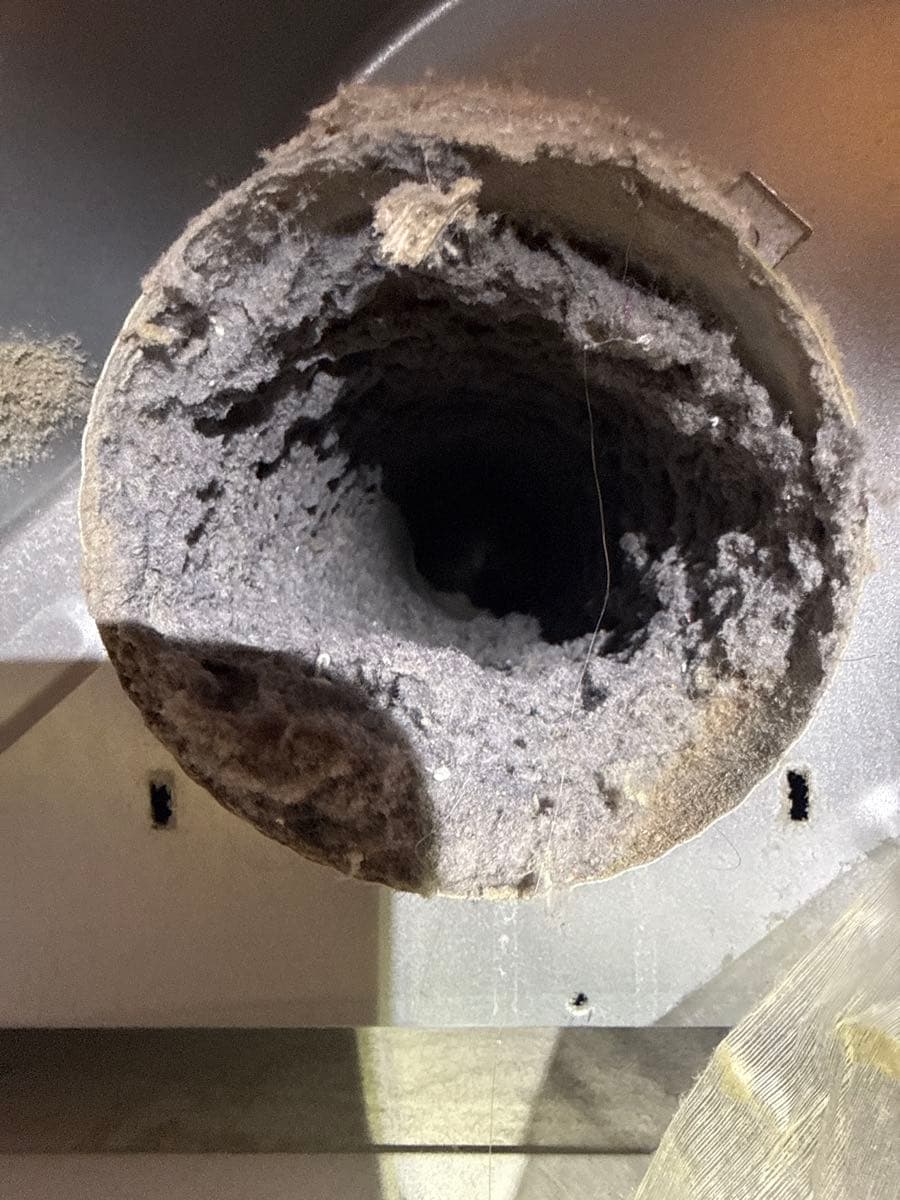
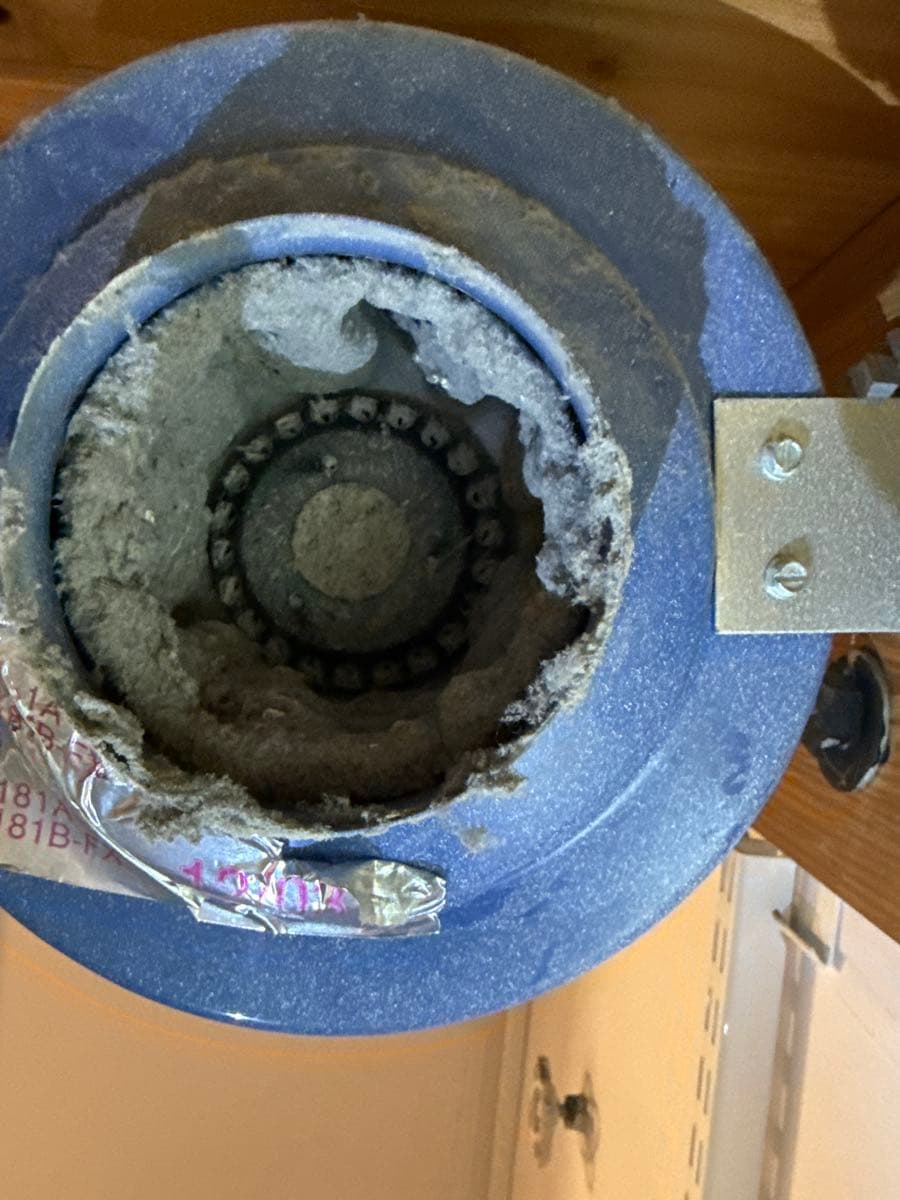
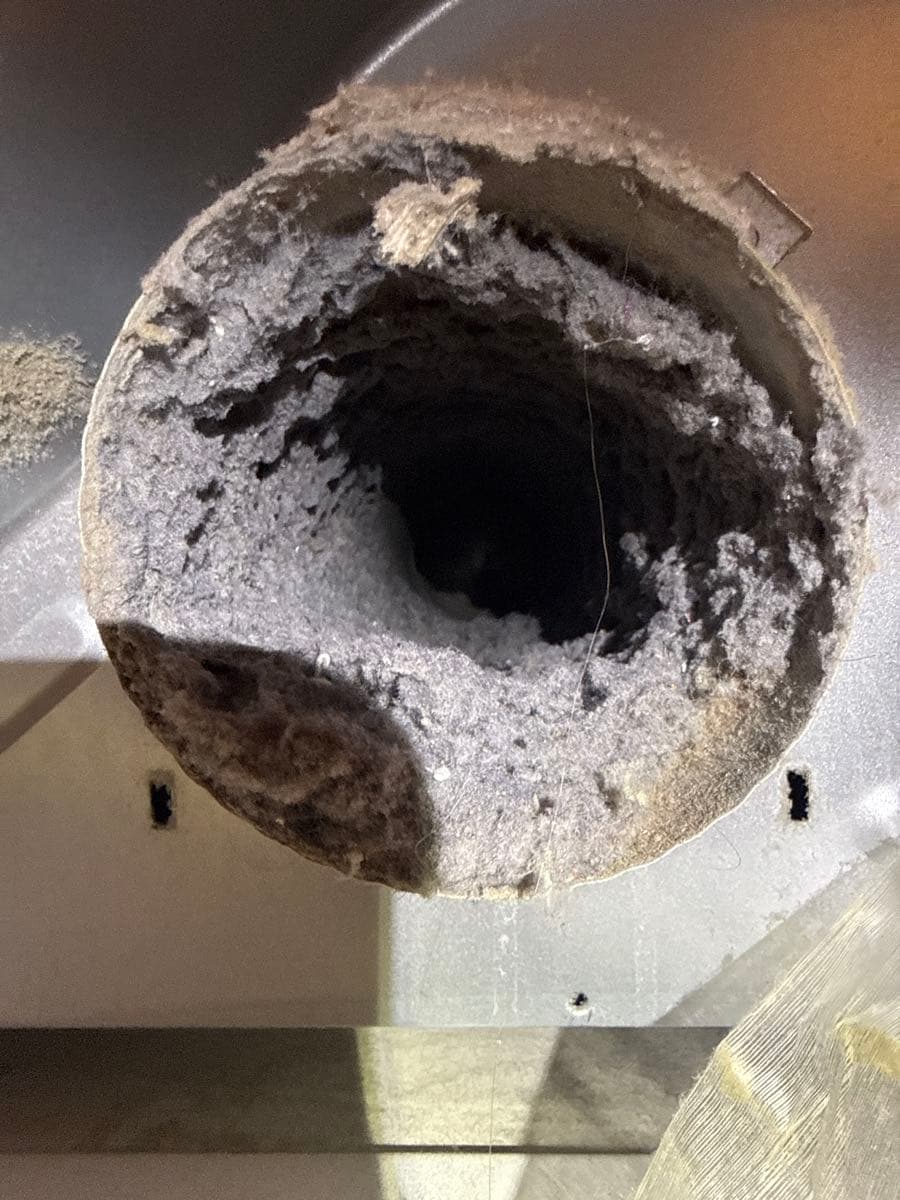
Fully blocked dryer exhaust duct opening before cleaning
Severe Lint Blockage Cleared at San Francisco Residence
During this service call in San Francisco, our technician discovered one of the more serious lint accumulation cases documented in recent inspections. The dryer exhaust duct opening was heavily occluded, with compacted lint coating the interior walls and leaving only a narrow passageway through the center of the duct. This level of restriction, classified as severe lint buildup (greater than 50% occlusion), places the system well below the minimum airflow threshold that dryer manufacturers require for safe operation, typically 300 CFM or above. Per IRC M1502.1 and general NFPA fire-safety guidance, a system in this condition presents an immediate fire hazard and requires urgent professional cleaning.
Interior Dryer Cleaning and Transition Duct Assessment
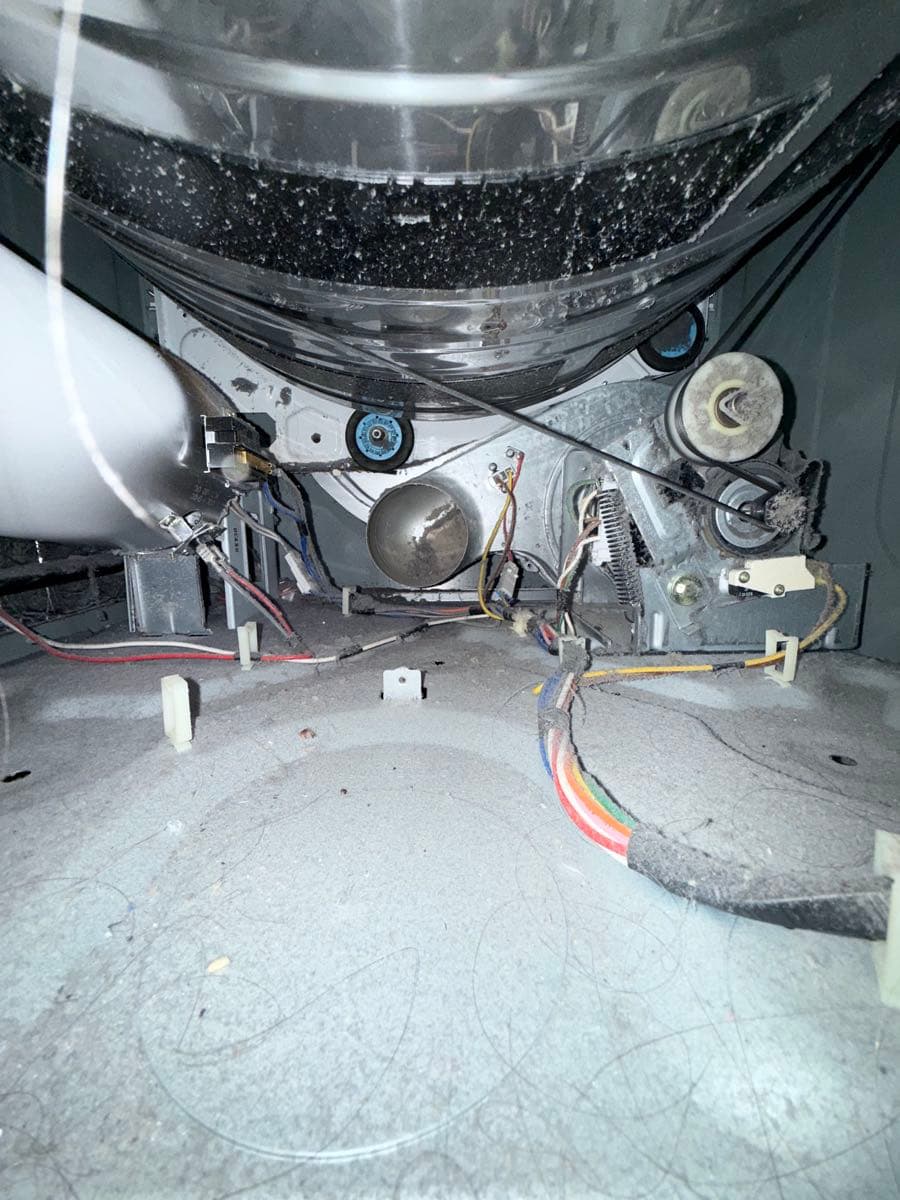
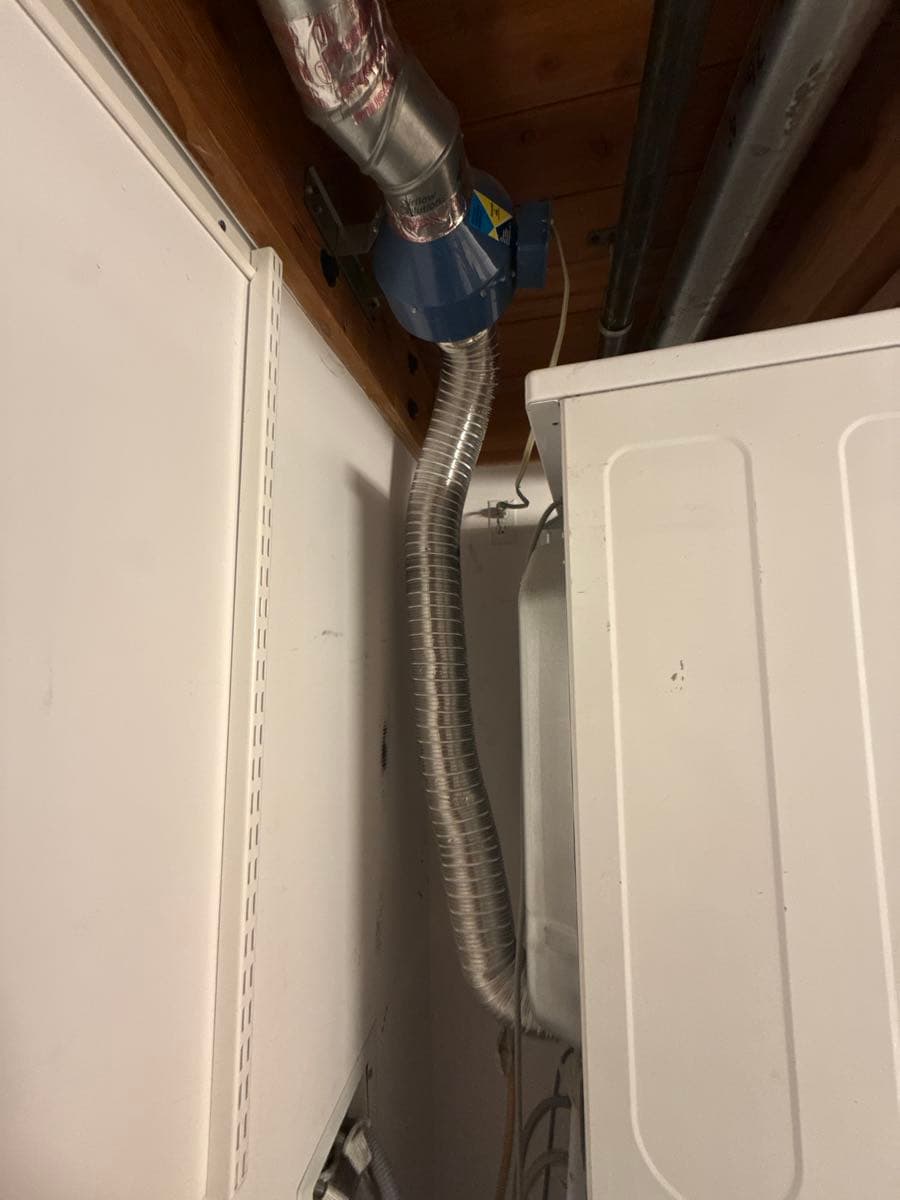
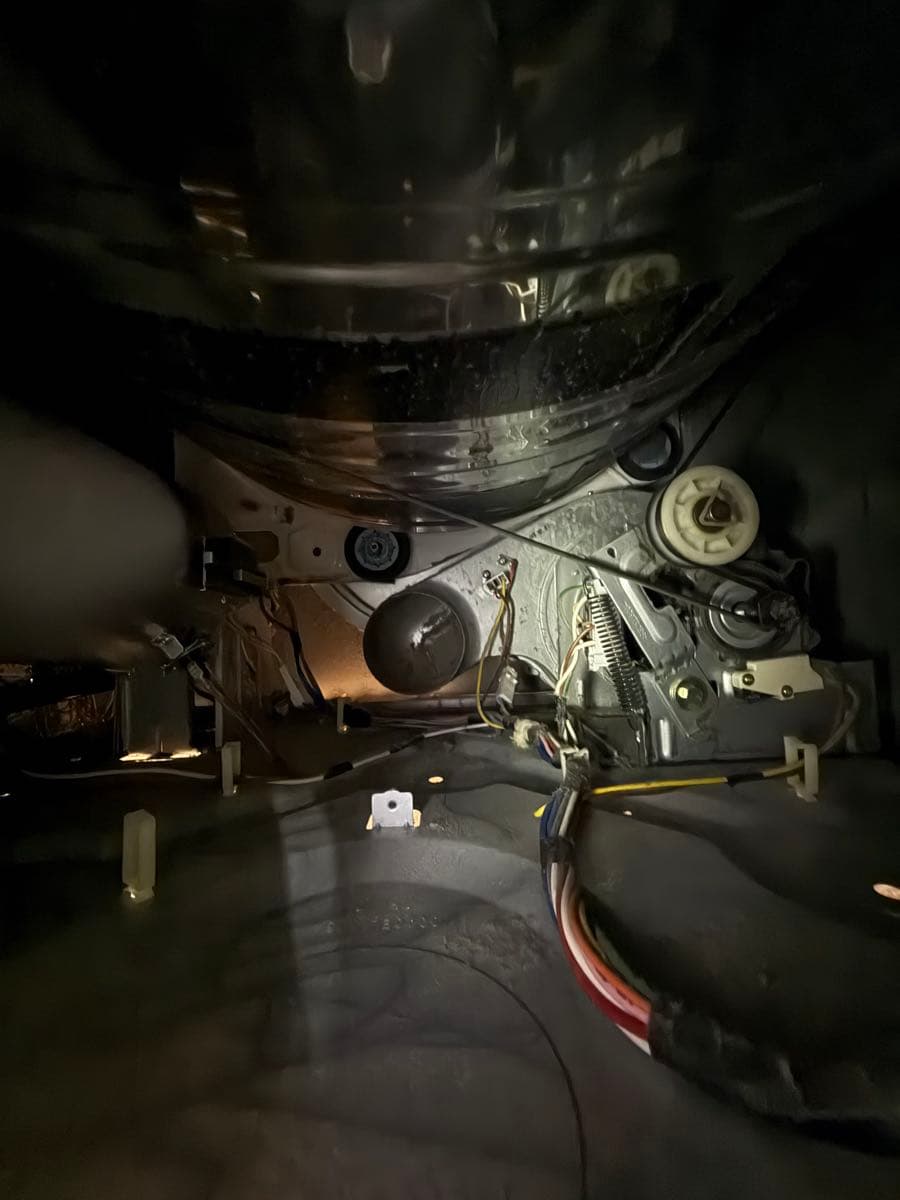
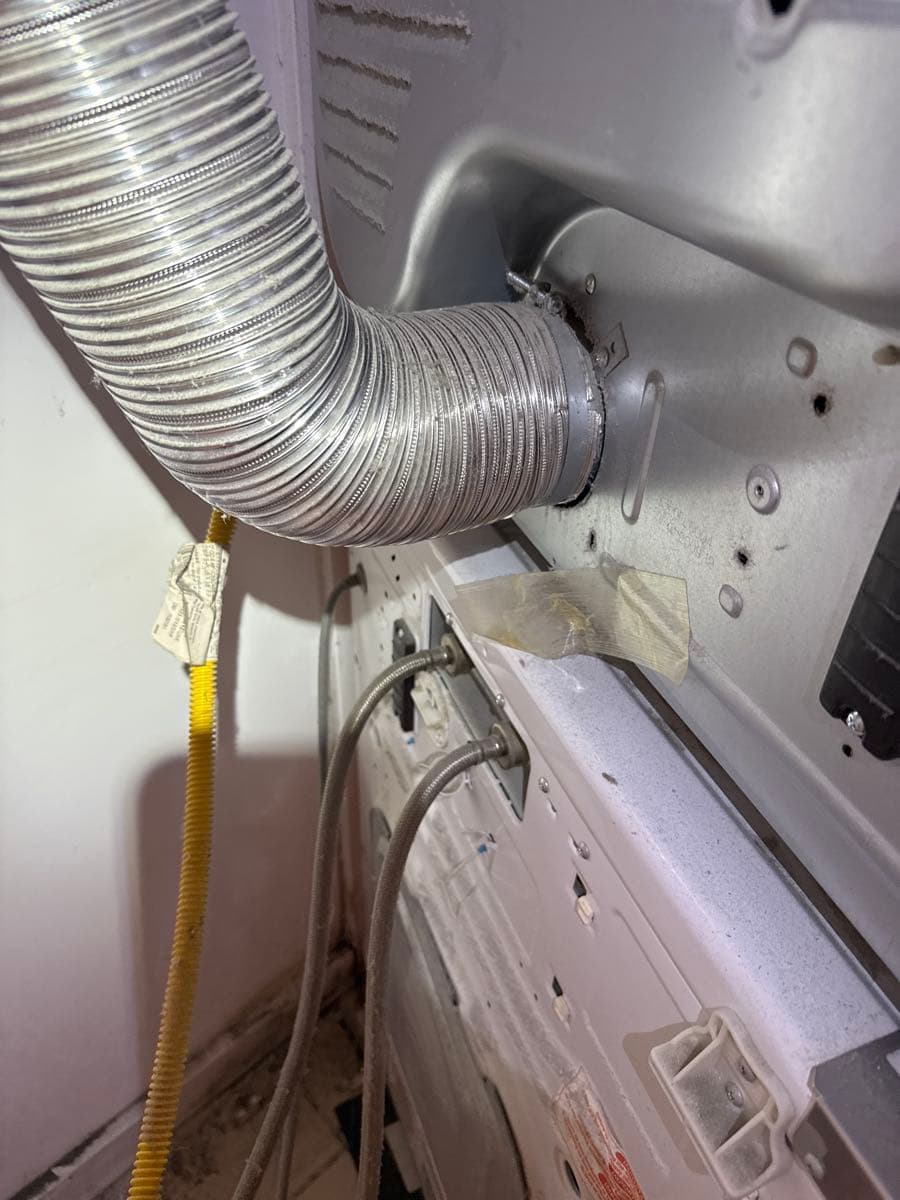
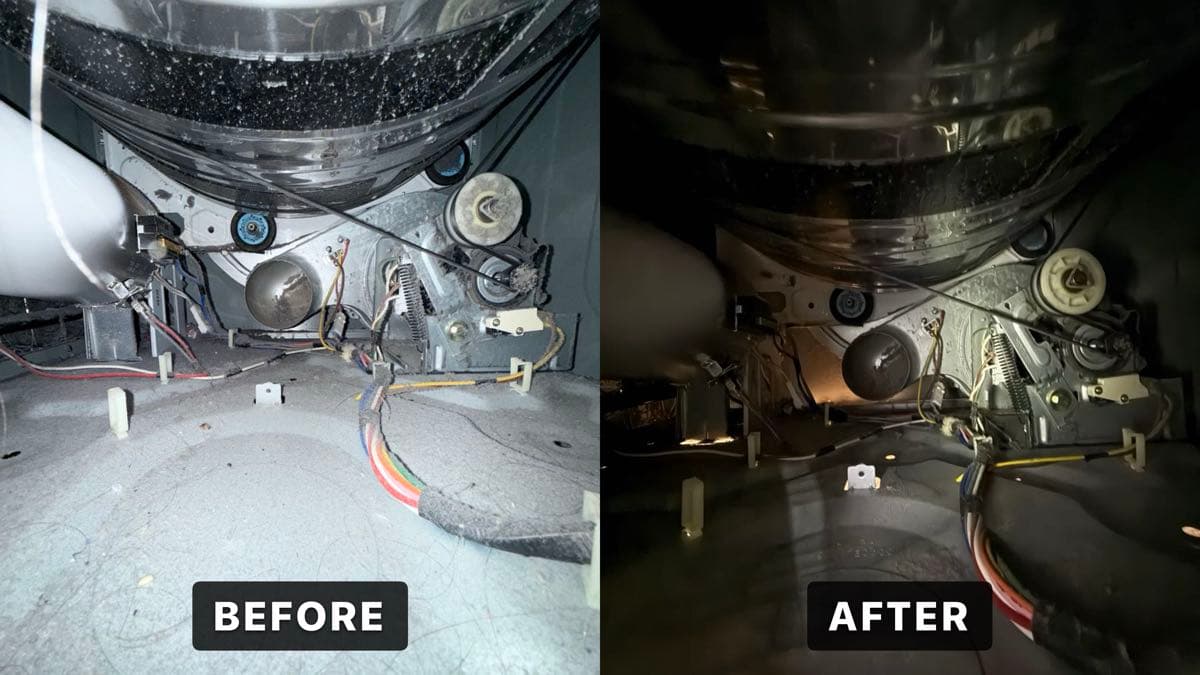
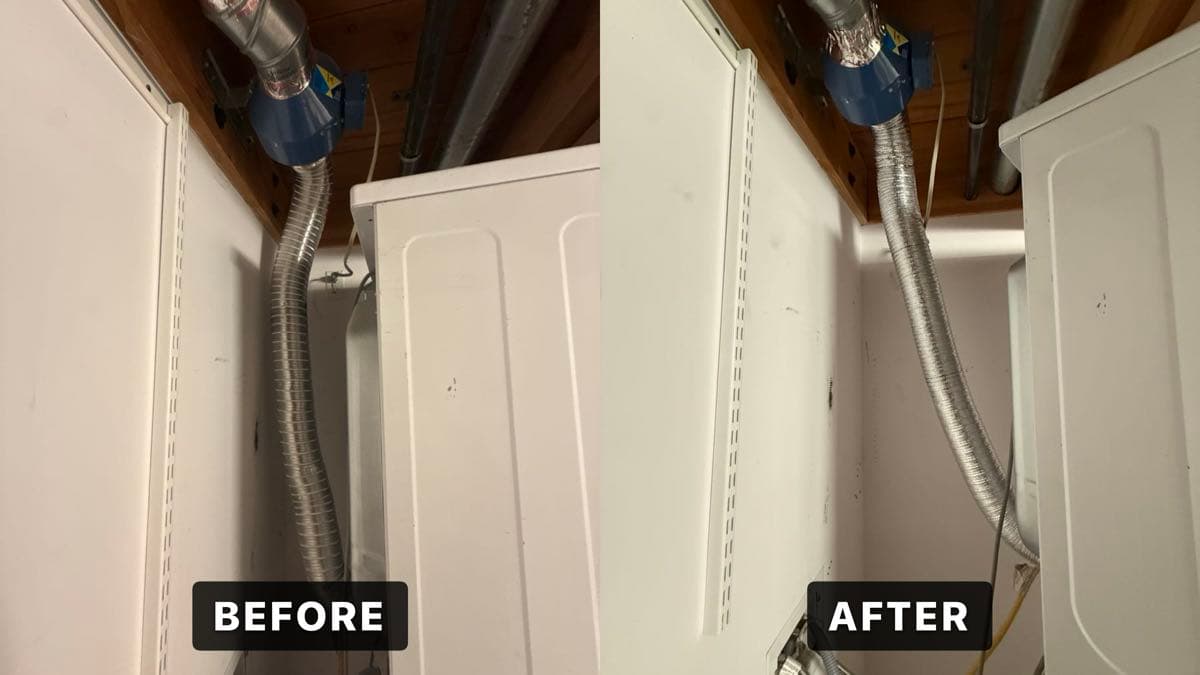
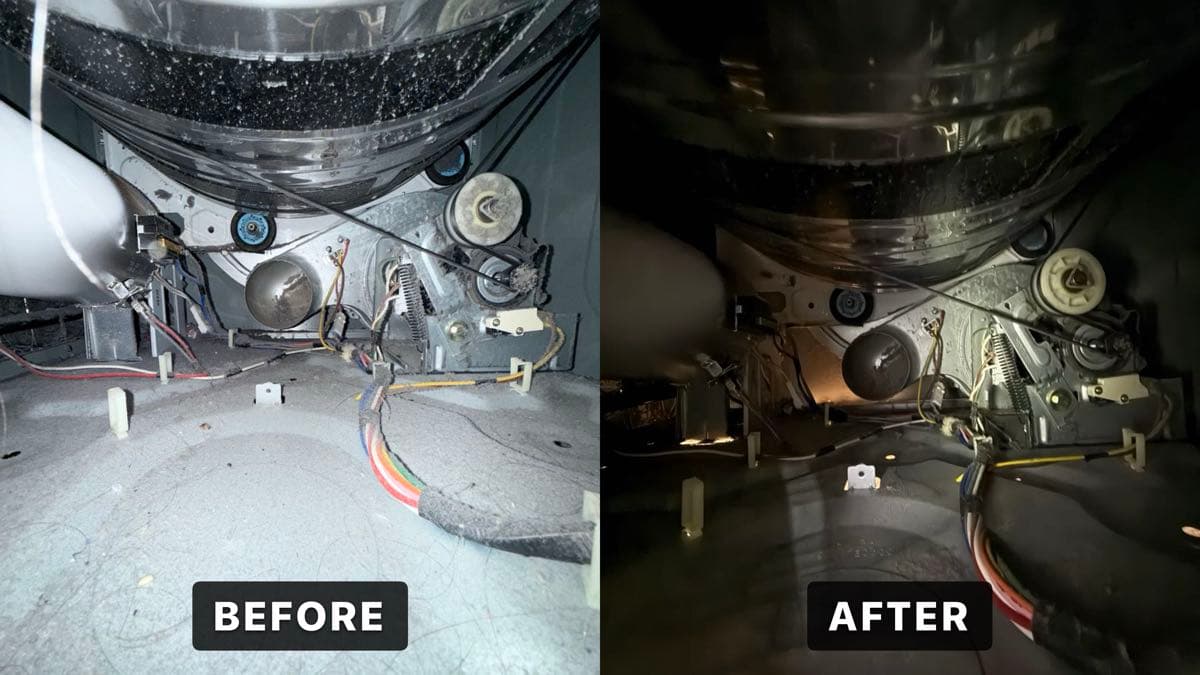
Beyond the main exhaust duct, the dryer's interior was found to be heavily coated with lint and debris around the heating element, blower wheel, drum support area, and thermal cutoff components. The lint trap screen was also nearly completely blocked by a thick, matted layer of accumulated lint, indicating the trap had not been cleaned consistently between drying cycles. Our technician performed a thorough interior cleaning, clearing lint from all accessible internal components to restore proper airflow through the appliance and reduce the elevated temperatures caused by back-pressure from the blocked duct. The transition duct connecting the dryer to the main exhaust run was also inspected. The installation used flexible metallic ducting routed with a sharp upward bend immediately behind the dryer, which creates a known lint and condensation trap. The duct also showed inadequate support, with visible sagging between fastening points. Proper support intervals should not exceed 12 feet per IRC duct installation requirements, and all bends should follow gradual routing to prevent lint accumulation.
Duct Routing Improvements and Compliance Notes
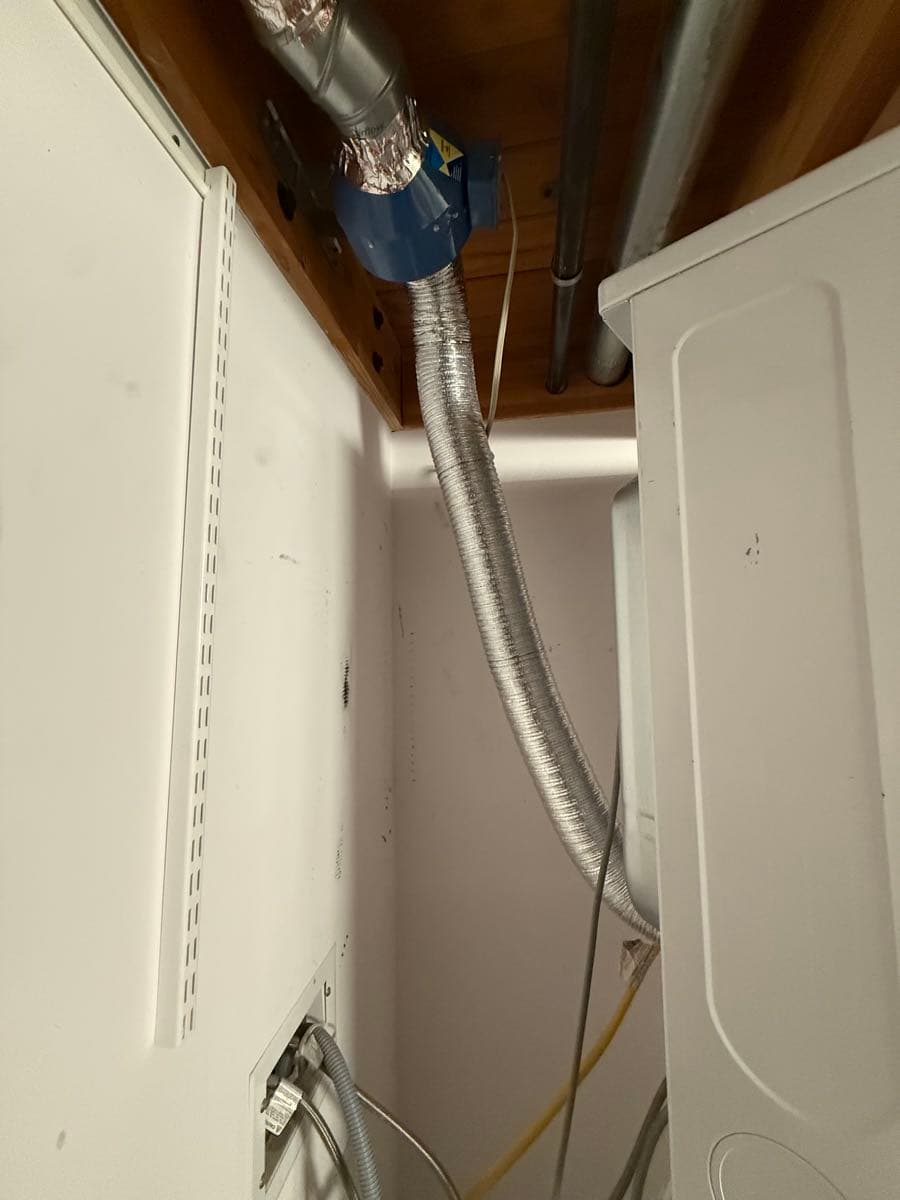
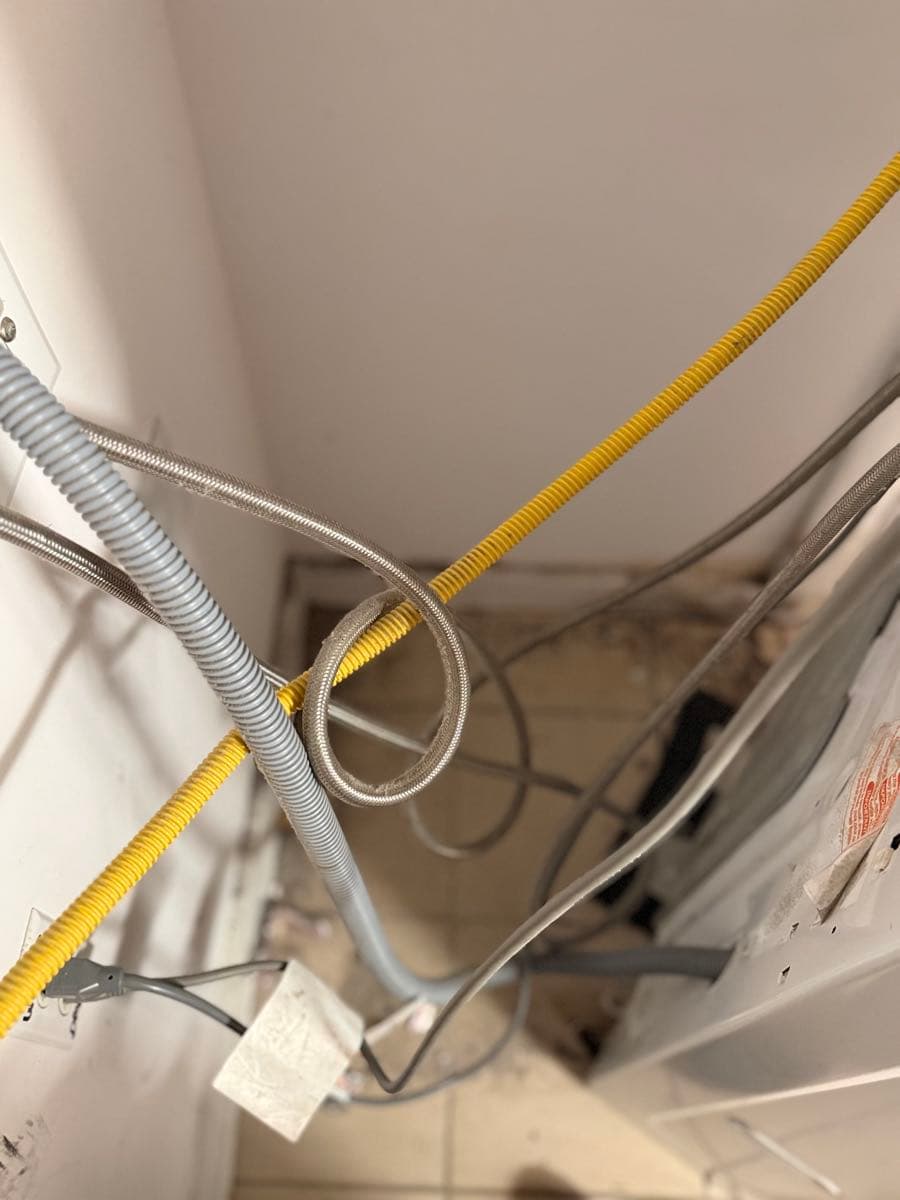
After cleaning, the duct routing was addressed to reduce problematic bends and improve slope. The before-and-after photos document the flexible metallic duct straightened and more properly aligned, with the connection at the dryer outlet reseated to eliminate the gap and misalignment visible at the rear of the unit. While the transition duct used is flexible metallic material, best practice per IRC M1502 specifies that transition ducts be a single listed length no greater than 8 feet, not concealed within construction, and listed per UL 2158A. These parameters were noted for the homeowner's reference. The periscope-style vent cap at the ceiling termination point was also inspected as part of the service.
Outcome and Maintenance Recommendations
Following the cleaning and duct correction, the exhaust pathway was cleared of the compacted lint blockage that had created both a fire hazard and a significant reduction in dryer efficiency. Homeowners in San Francisco are encouraged to have their dryer exhaust system professionally inspected and cleaned annually, consistent with NFPA recommendations, and to clean the lint trap screen before every drying cycle. Any recurrence of extended drying times, excessive heat near the dryer, or a burning smell should be treated as a warning sign requiring immediate inspection.
Project photos
12 photos
Need similar work in San Francisco?
Get a free quote - same-week appointments usually available.